Crop 3D Models
Anatomy Viewer features a simple widget that allows you to crop 3D models with relative ease. There are two crop functions available in Anatomy Viewer, which can be activated by selecting either of the following buttons.
Once clicked, a bounding box will be created around the 3D Model. Each face has a handle (sphere), which you can select and drag inwards to crop the model along that axis. On release of the handle, the software will perform some computations and carry out the cut. As you drag any face of the bounding box inward, a preview of what remains and what is cropped out is generated in real-time. The cropped part is highlighted in white, when the 3D window has a black background, or grey, when the 3D window has a white background. Take the example of a pelvic fracture below.
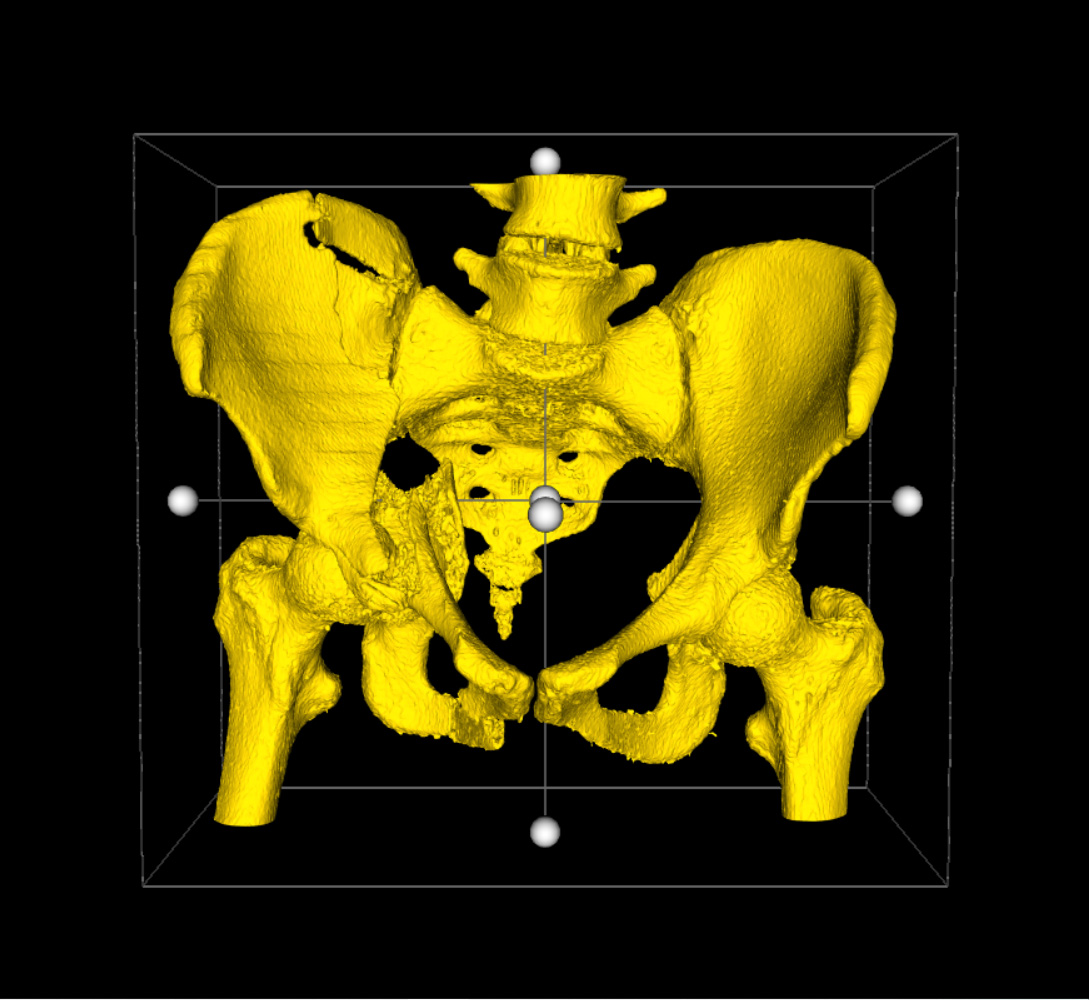
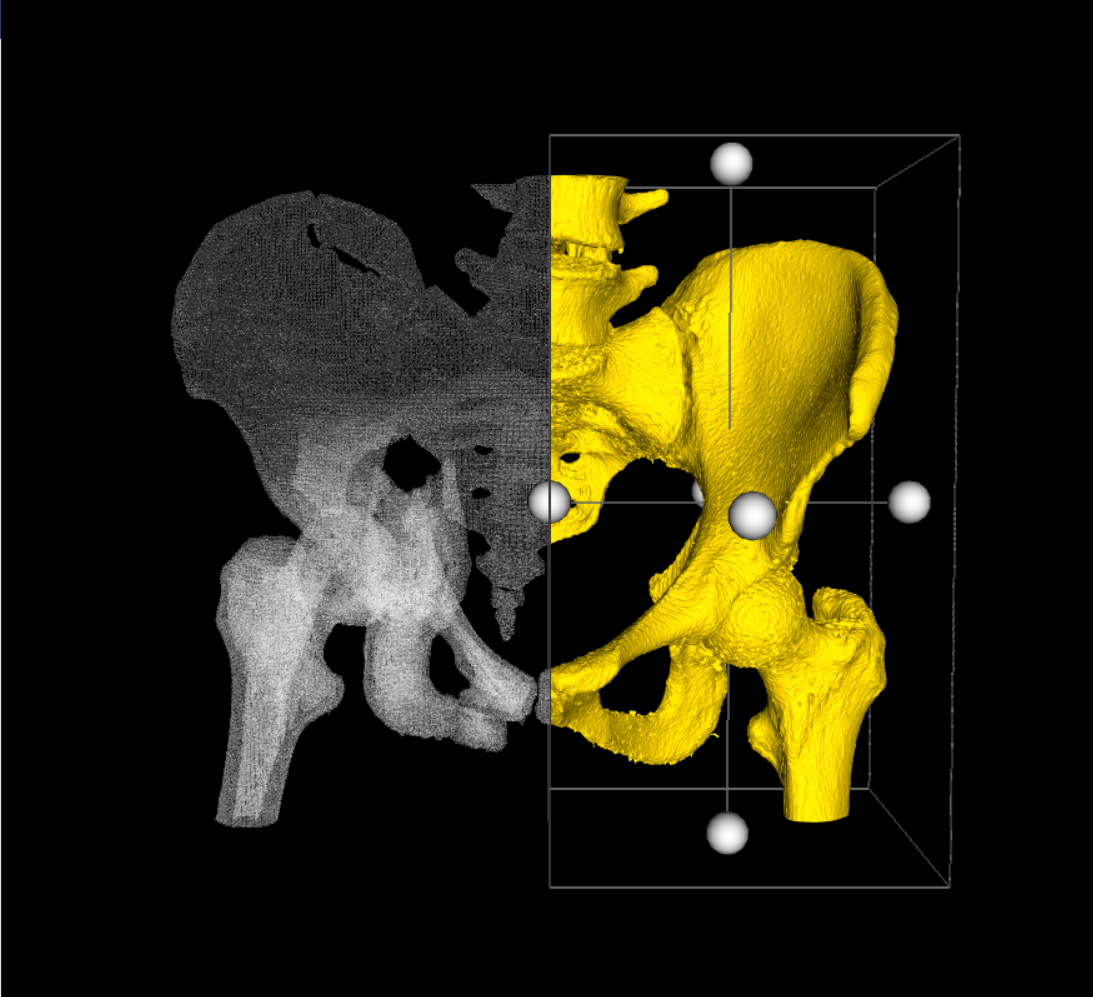
Once you are satisfied with the preview, simply select the Cut button, and the crop will be performed. If you wish to undo the operation, simply drag the handle back to its original position. If you want to undo the operation, and disable the crop widget altogether, select the Cancel button.
Difference Between the 2 Crop Functions
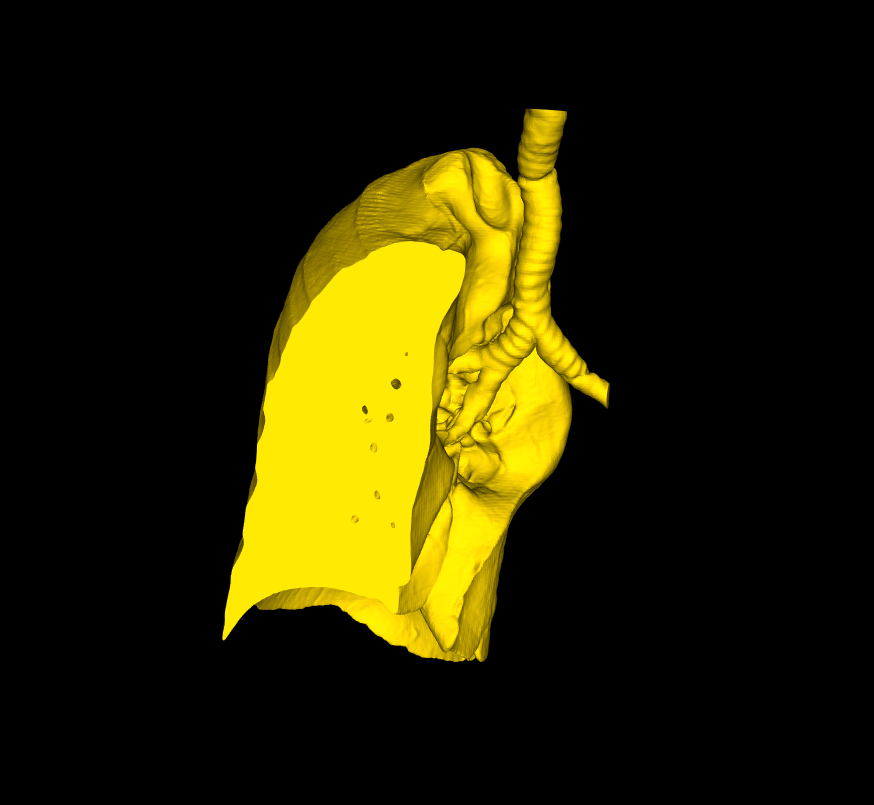
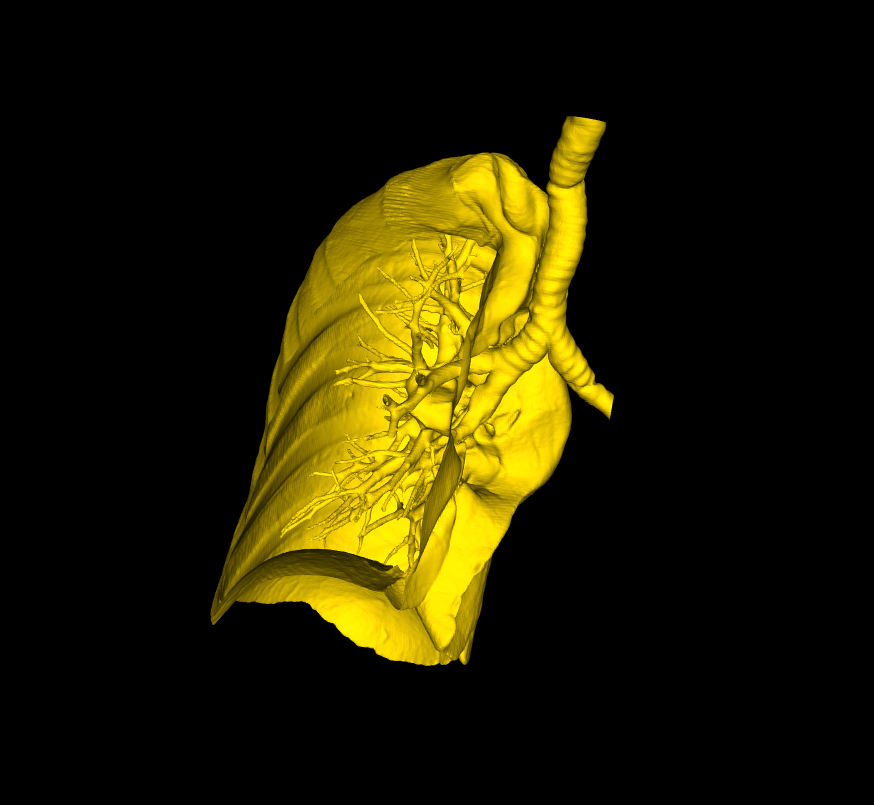
The main difference between the two, is what happens to the clipped surface after the cut. With the first, the boundaries of the cropped model are automatically filled by a flat surface, thereby making the 3D Model watertight. With the second, the boundaries are left open as illustrated below (right).
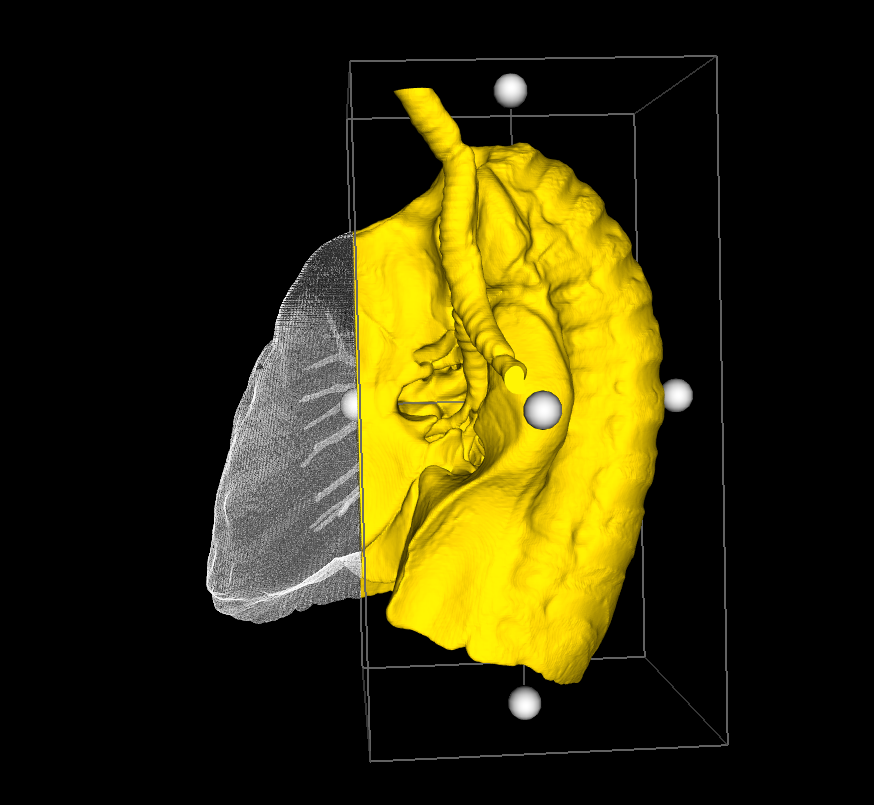
Crop Widget
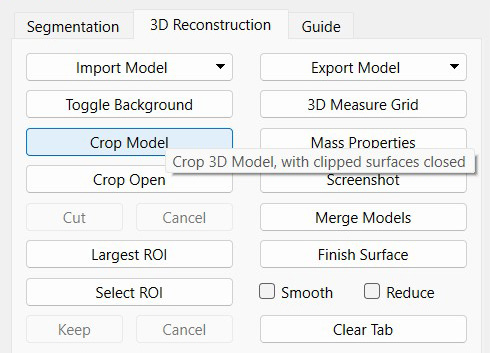
Crop – Closed Cut
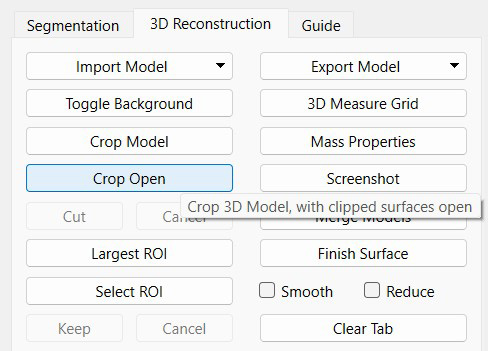
Crop – Open Cut
Open Cut: Useful if you want to view internal structures found within a closed surface.
Closed Cut: Useful in most other situations; particularly if you want to export the model to create a physical model, by 3D printing for example.