Watershed Segmentation
This guide will take you through the steps of watershed segmentation in Anatomy Viewer. The study involves a Brain MRI, imported in Nifti Format. This example will explain all the features provided by the application in detail.
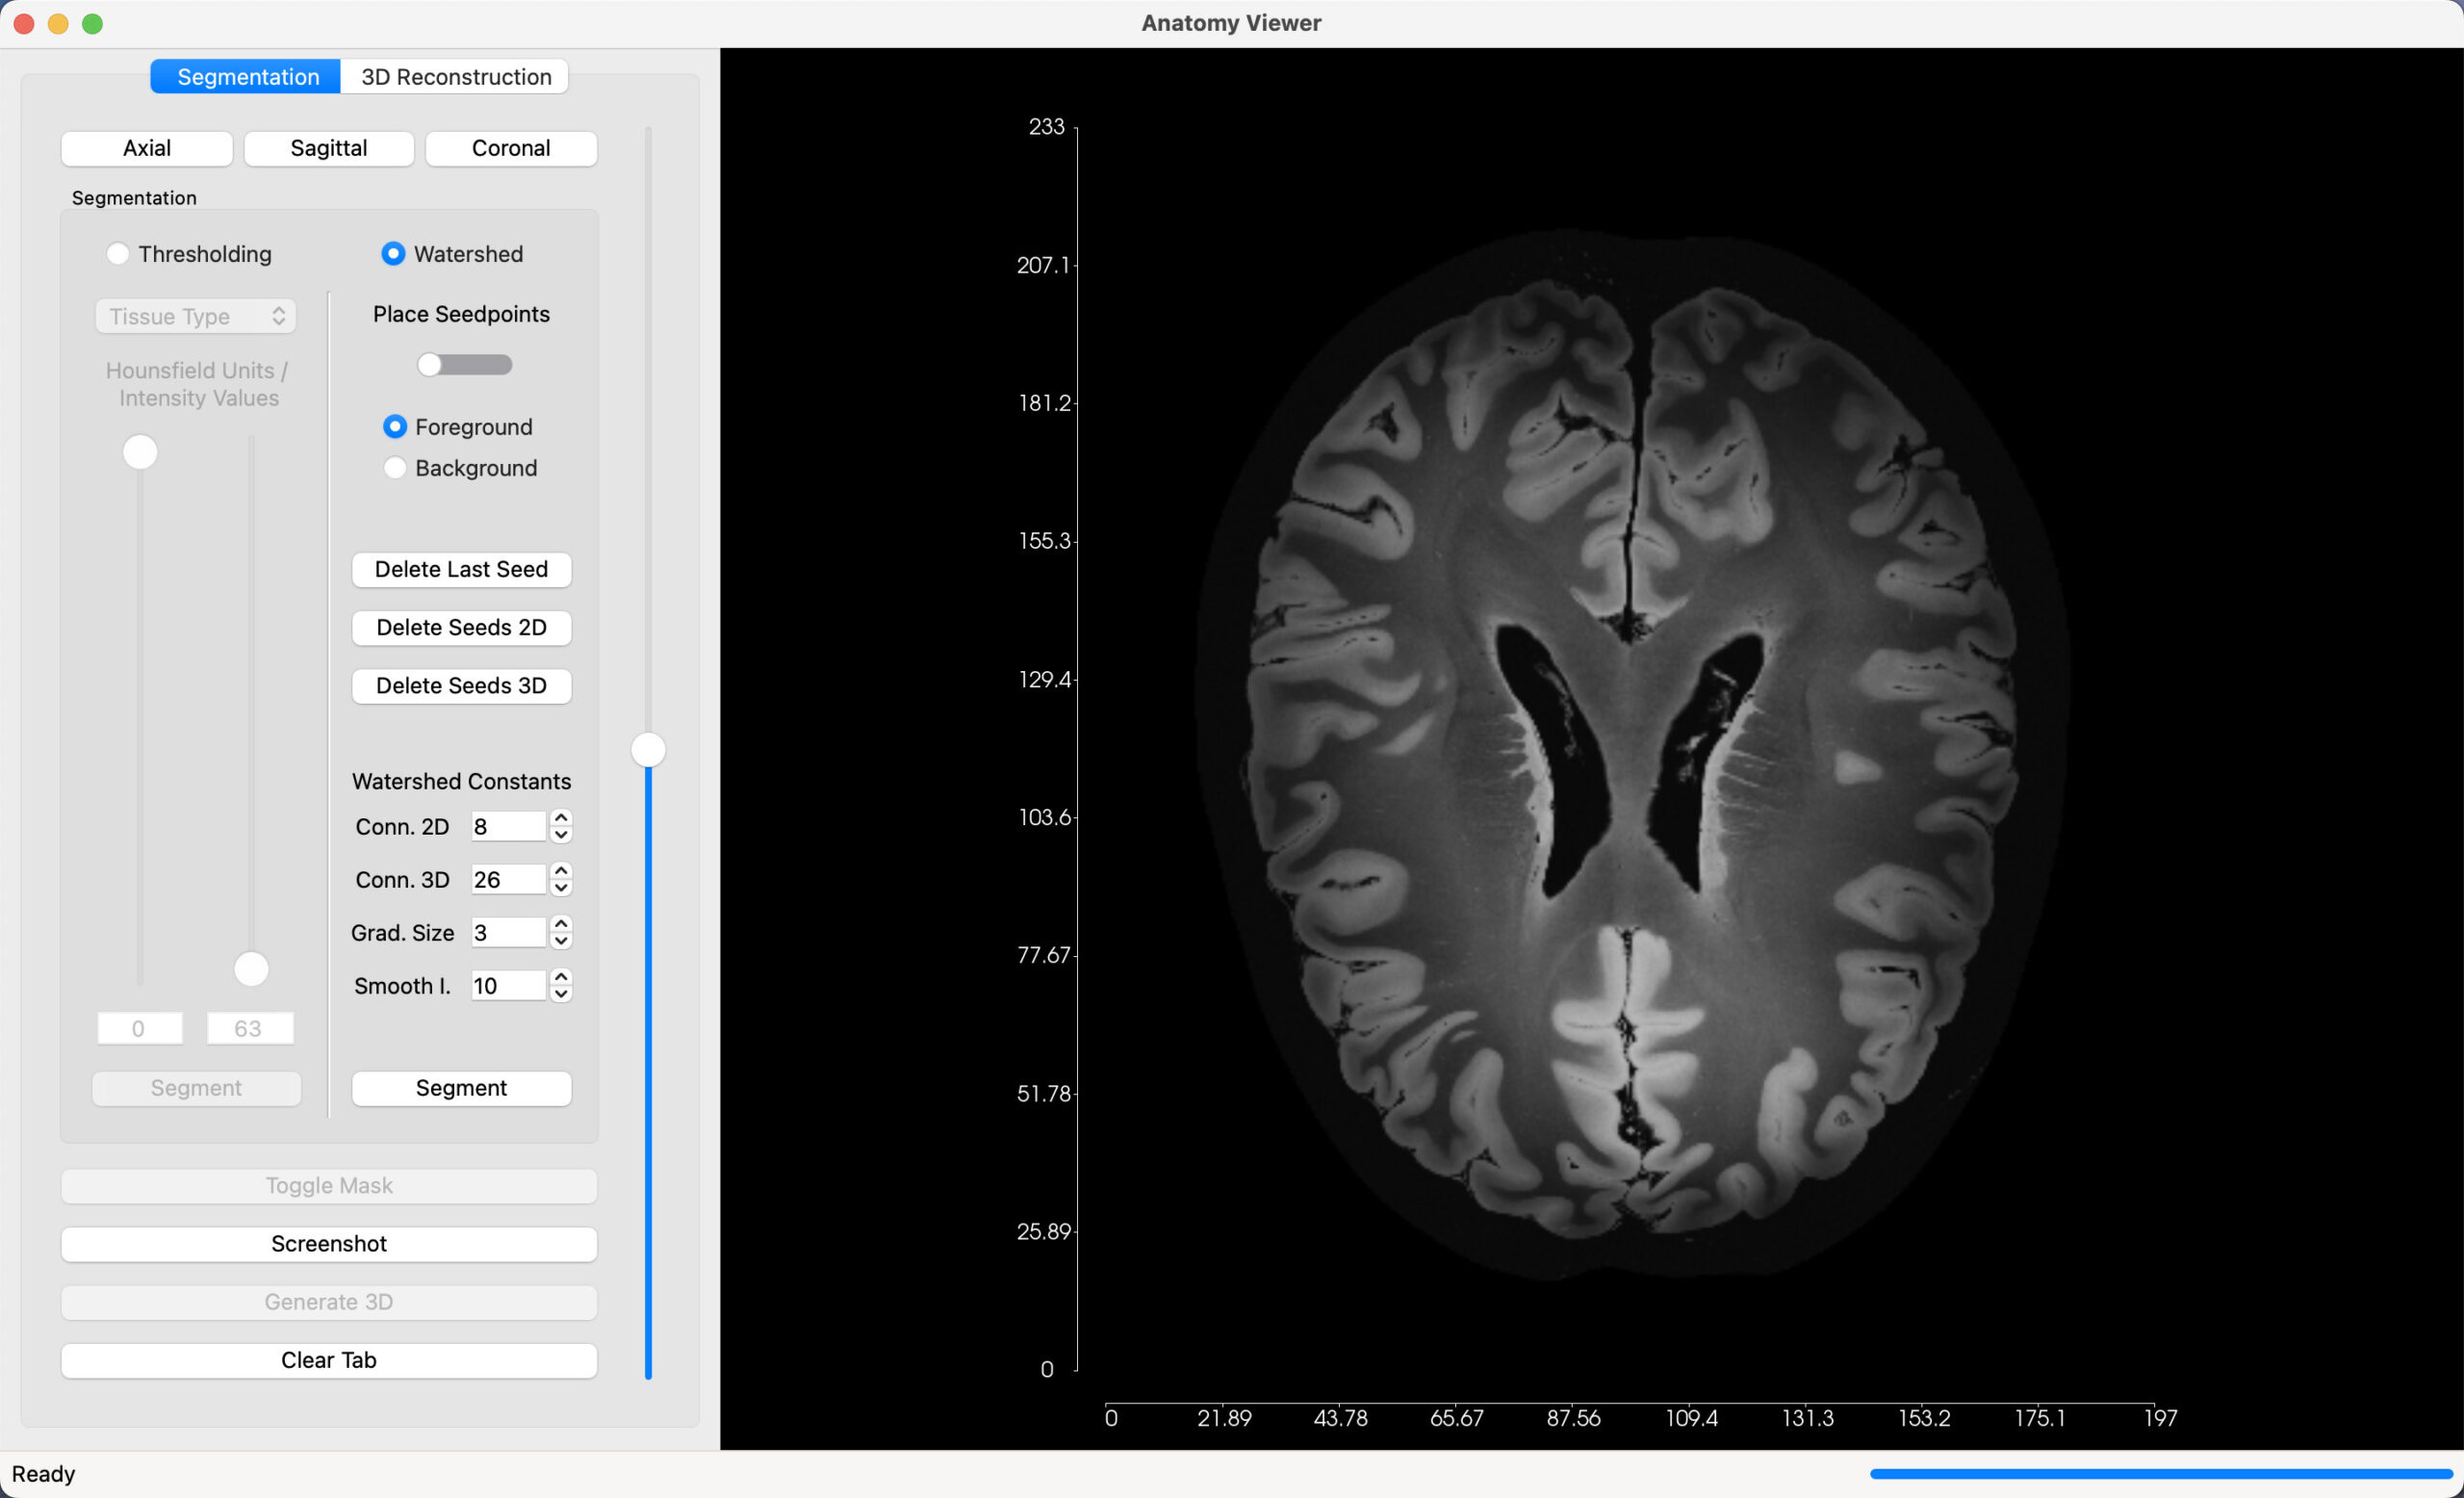
Once you start the application, and have the medical images loaded, select the segmentation type – watershed.
Place Seedpoints
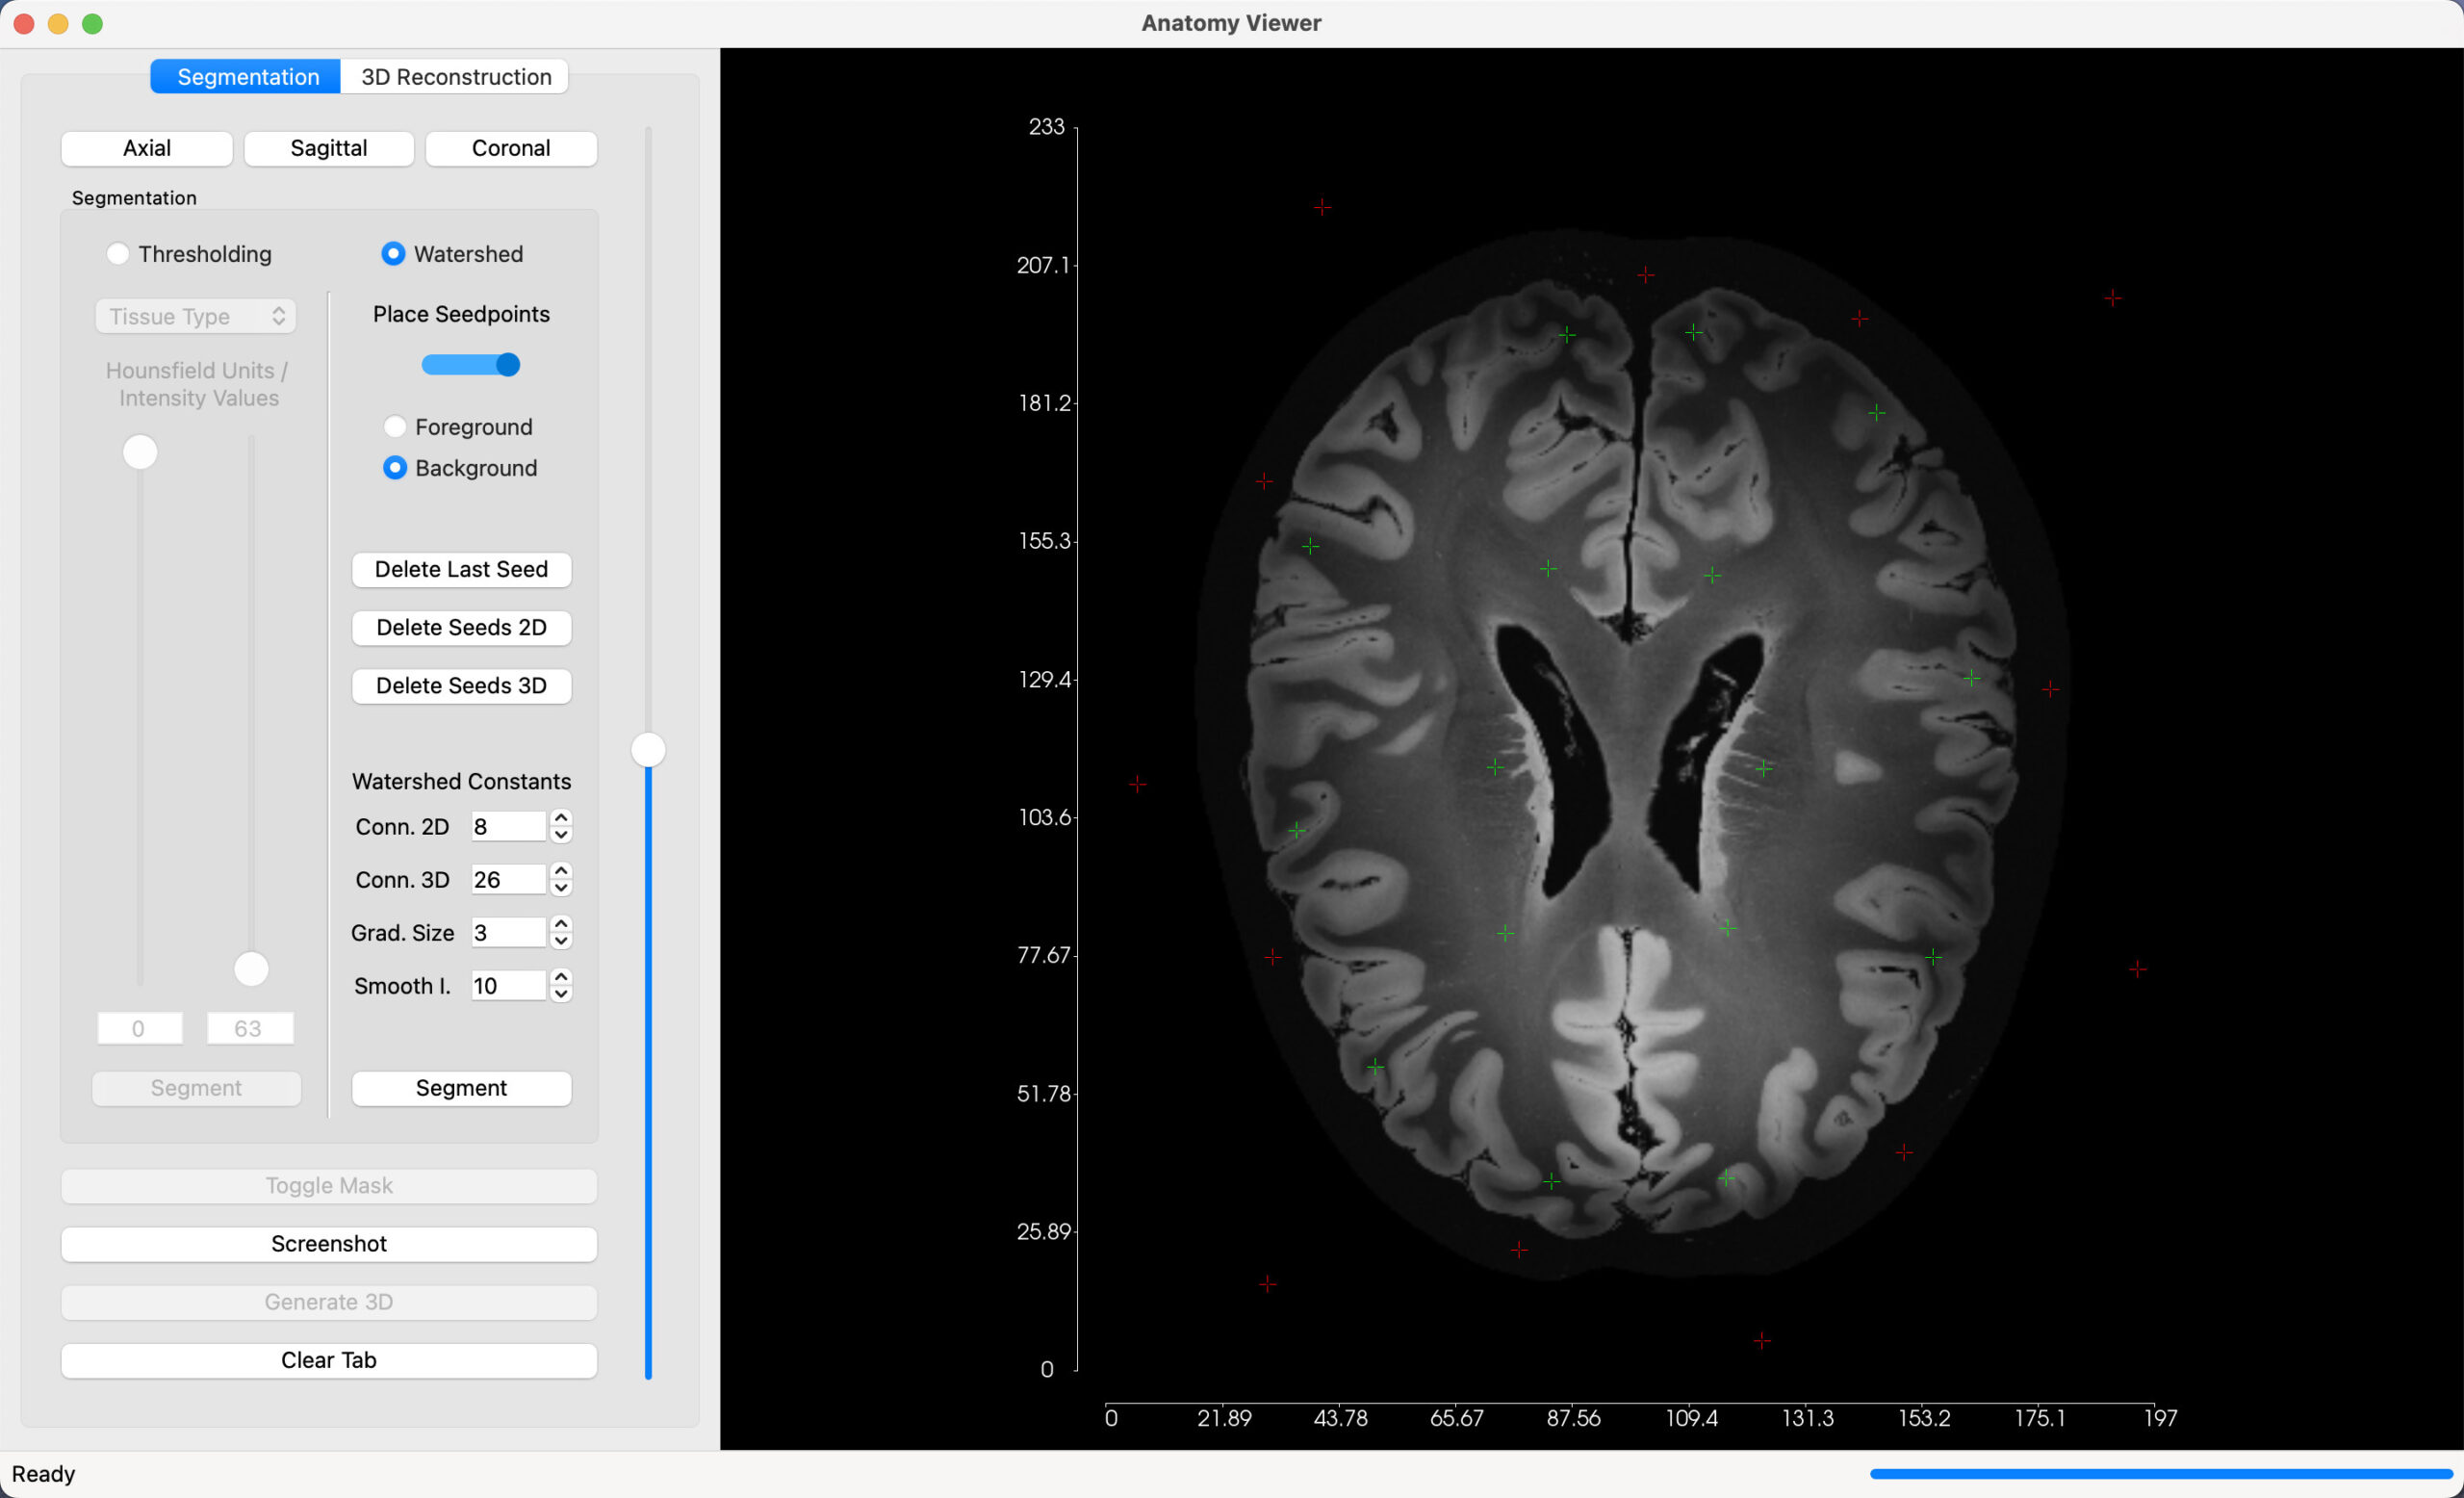
The watershed algorithm apportions pixels into marked basins. The markers are determined manually, and are provided by the user.
First activate the widget that permits placement of seedpoints over the image. Toggle the button below the ‘Place Seedpoints’ label. Two types of seedpoints can be placed over the image:
- Foreground (Green): mark areas that you want included in the final model.
- Background (Red): mark areas that you want excluded from the final model.
As with the example below, with foreground selected, we mark areas in the slice indicating the brain. Next, with background selected, we mark areas in the slice surrounding the brain. Place enough seedpoints around the image to give the algorithm sufficient markers to differentiate between the two areas.
As you place seedpoints, delete functions are provided in case you wish to undo marker placement or wish to start over.
- Delete Last Seed: Remove the last placed seedpoint.
- Delete Seeds 2D: Remove all seedpoints placed on the current slice in view.
- Delete Seeds 3D: Remove all seedpoints placed on all slices.
You can adjust the parameters put into the algorithm as below. The default values should give good results.
- 2D/3D Connectivity: Indicates the neighbours for connection in the algorithm.
- Gradient Size: Element used for the mathematical morphology operations. A larger value yields a more blurred morphological gradient.
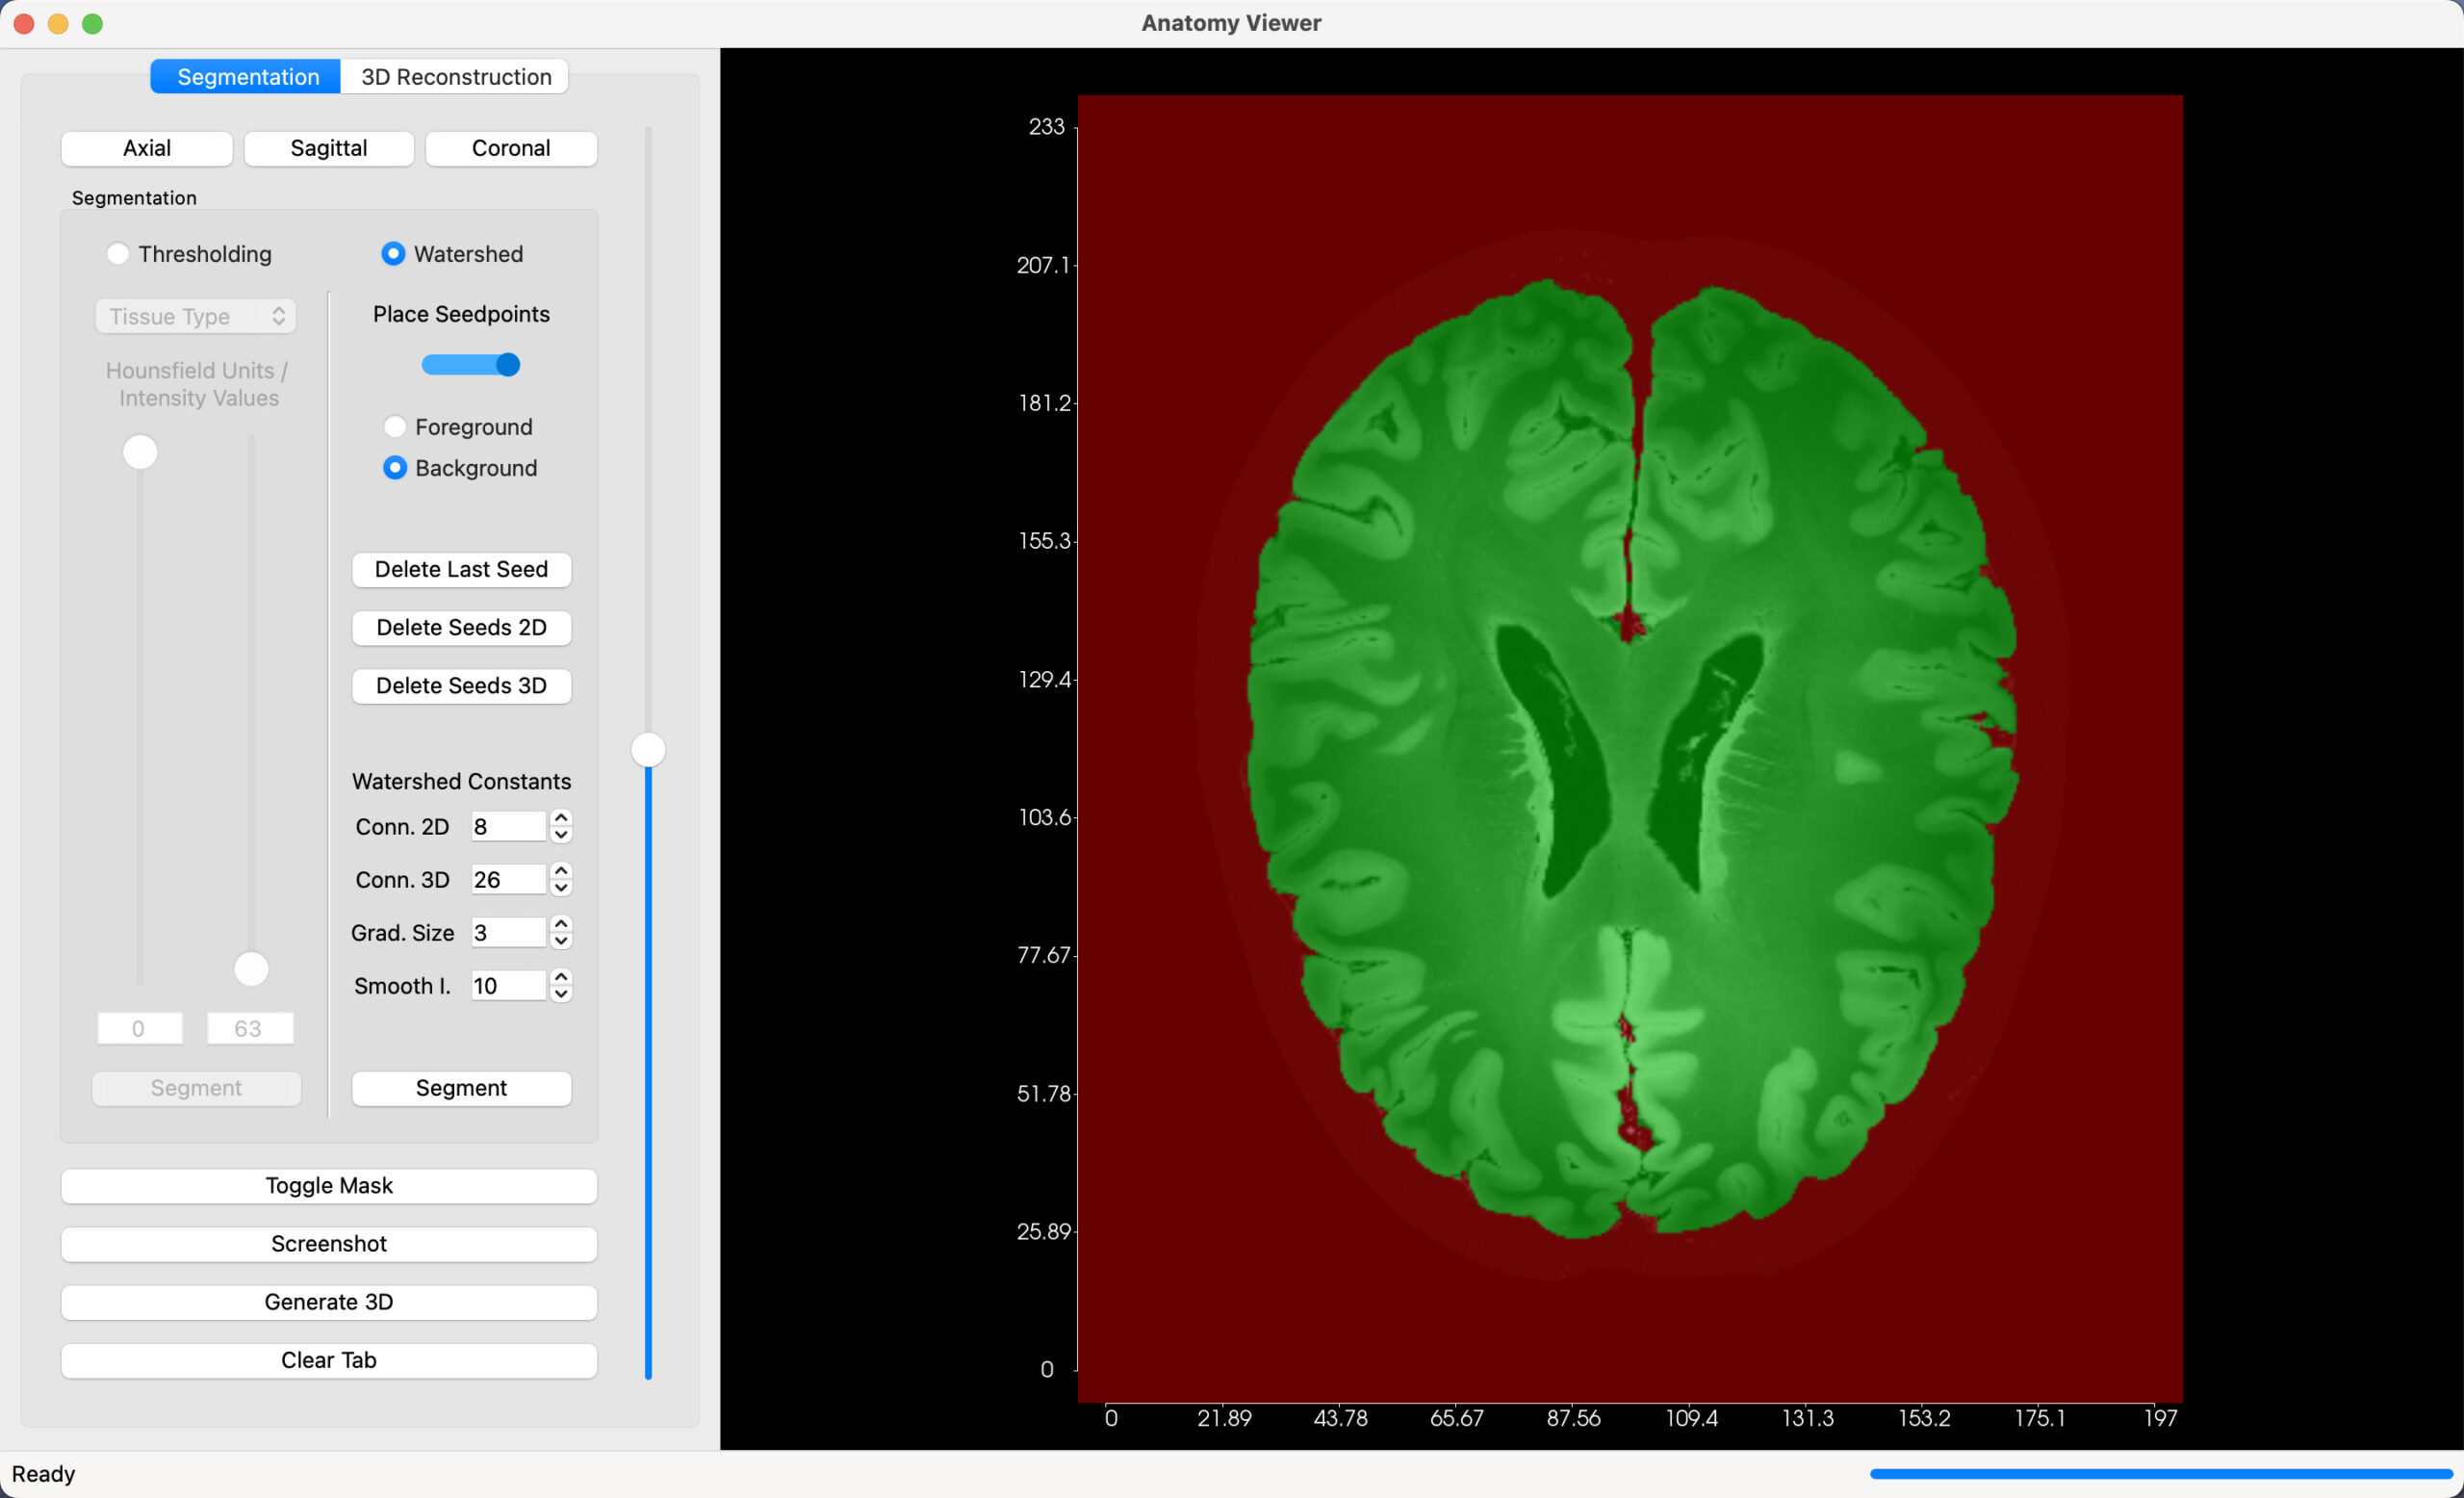
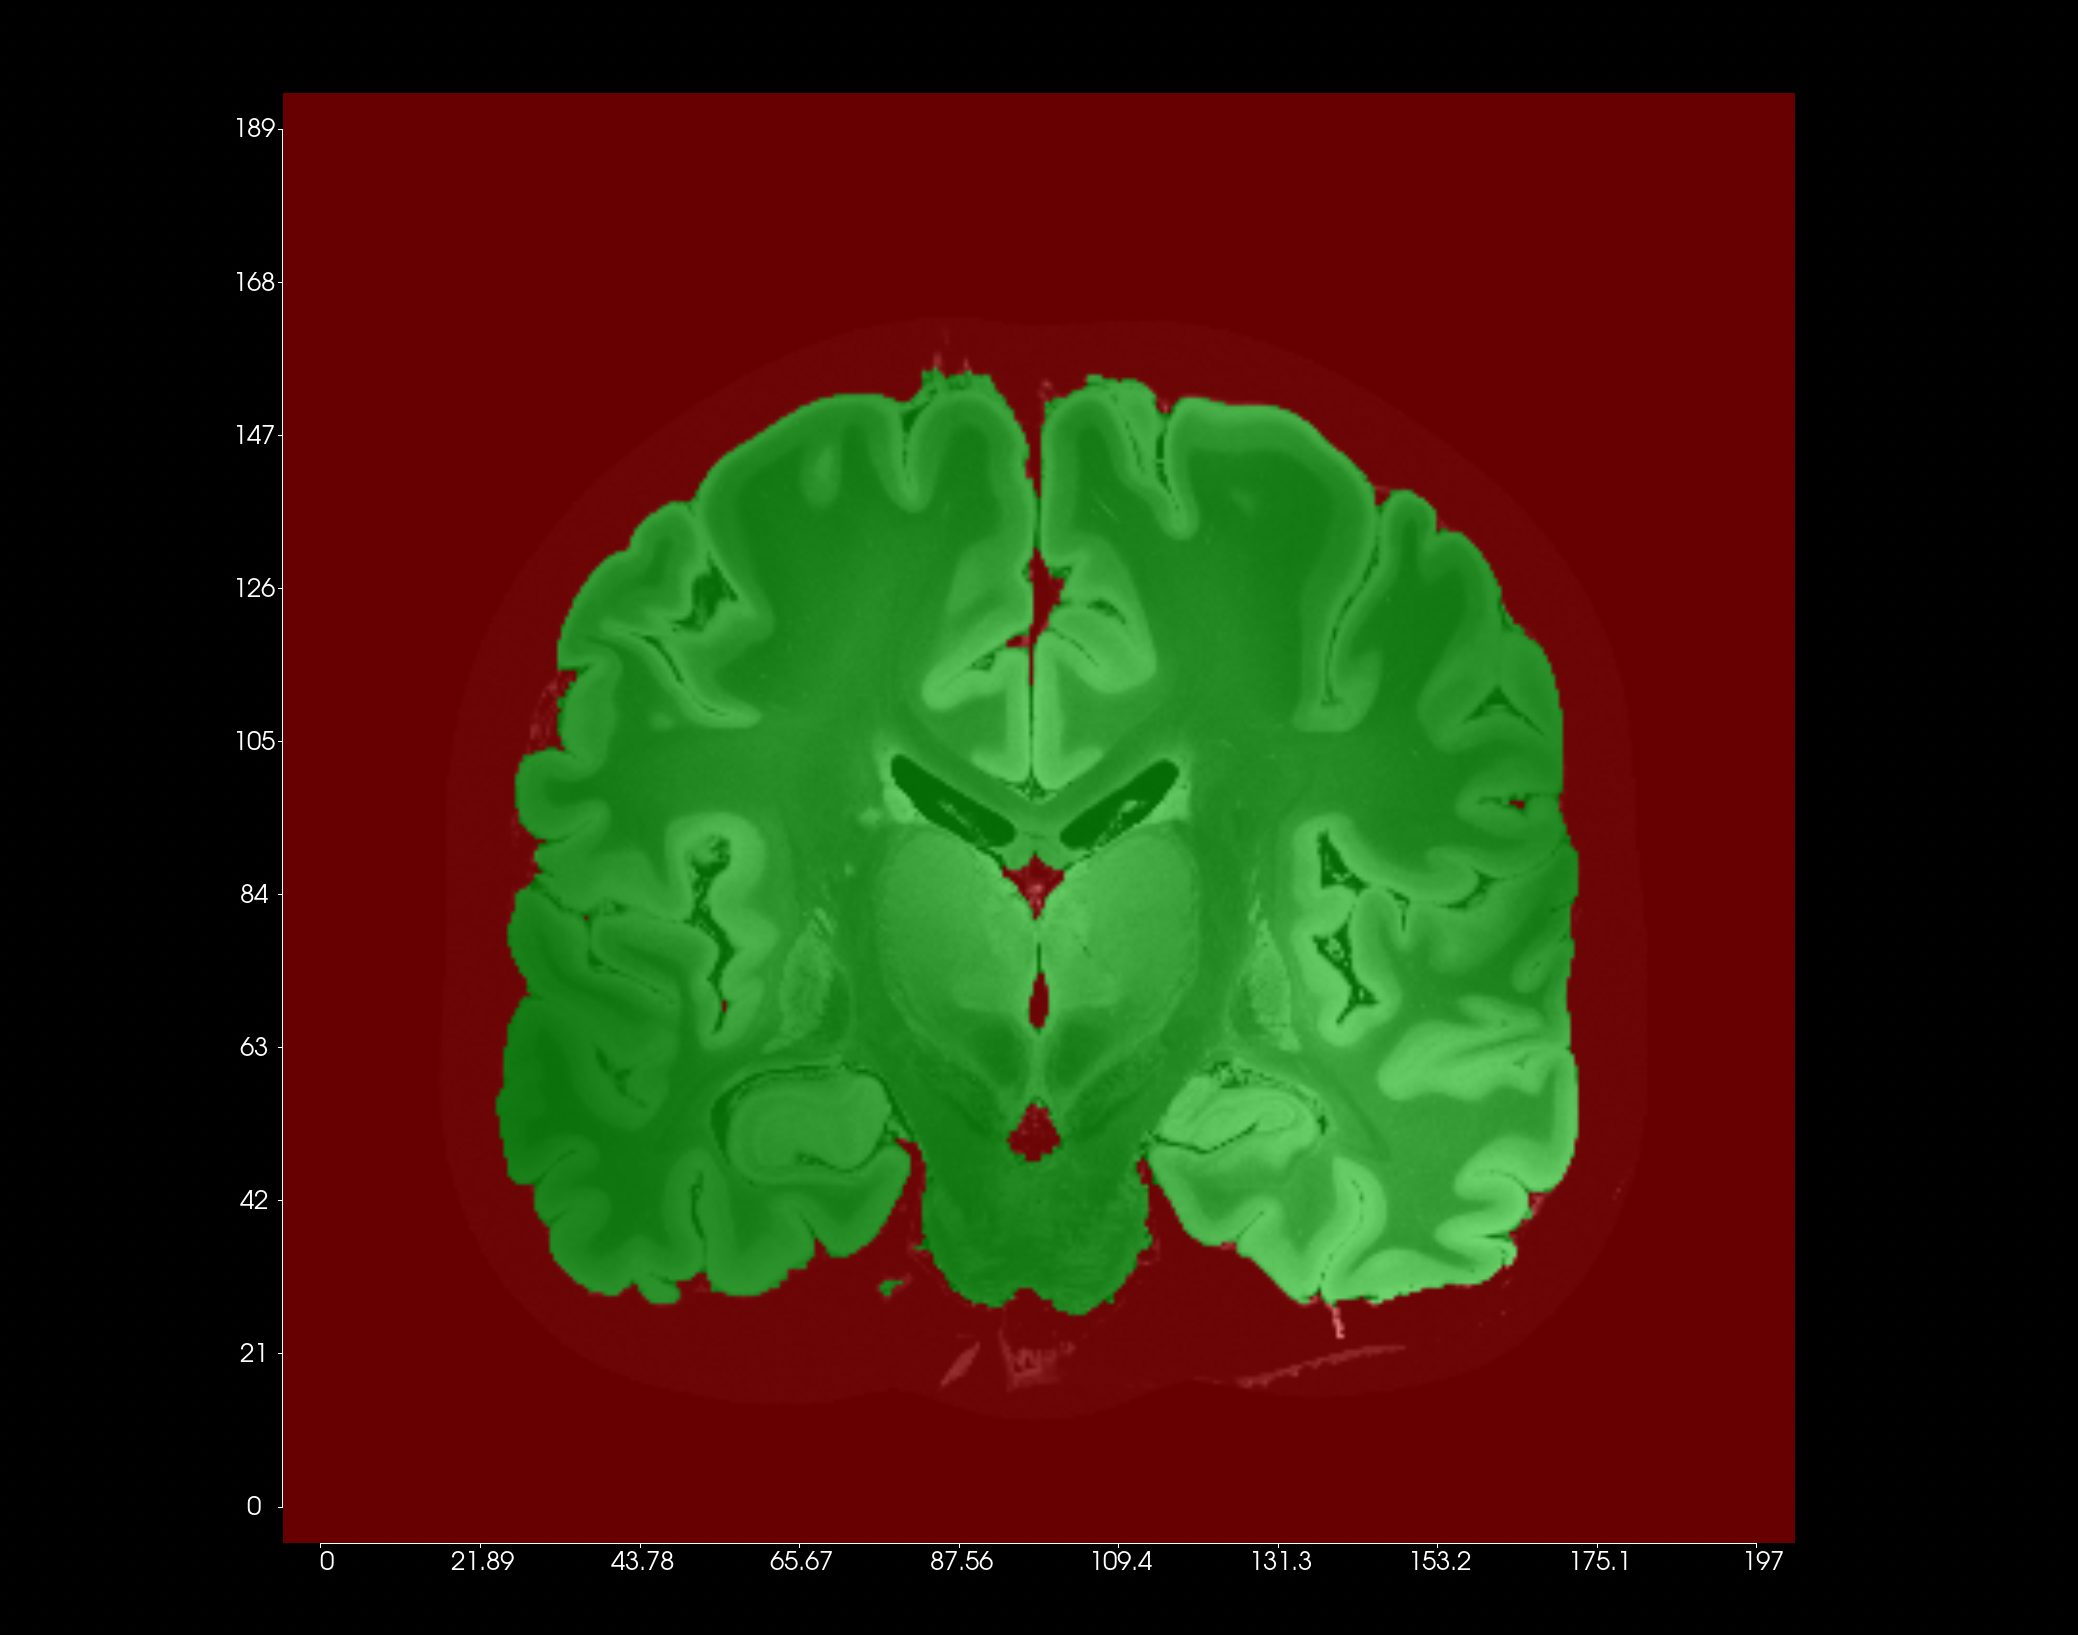
Once you are satisfied with the markers you have provided, select ‘Segment’ to begin the watershed segmentation process. The algorithm will attempt to partition the image into the two regions you indicated. A mask overlay will be generated over the initial image, as in the example below, showing you the results of the segmentation.
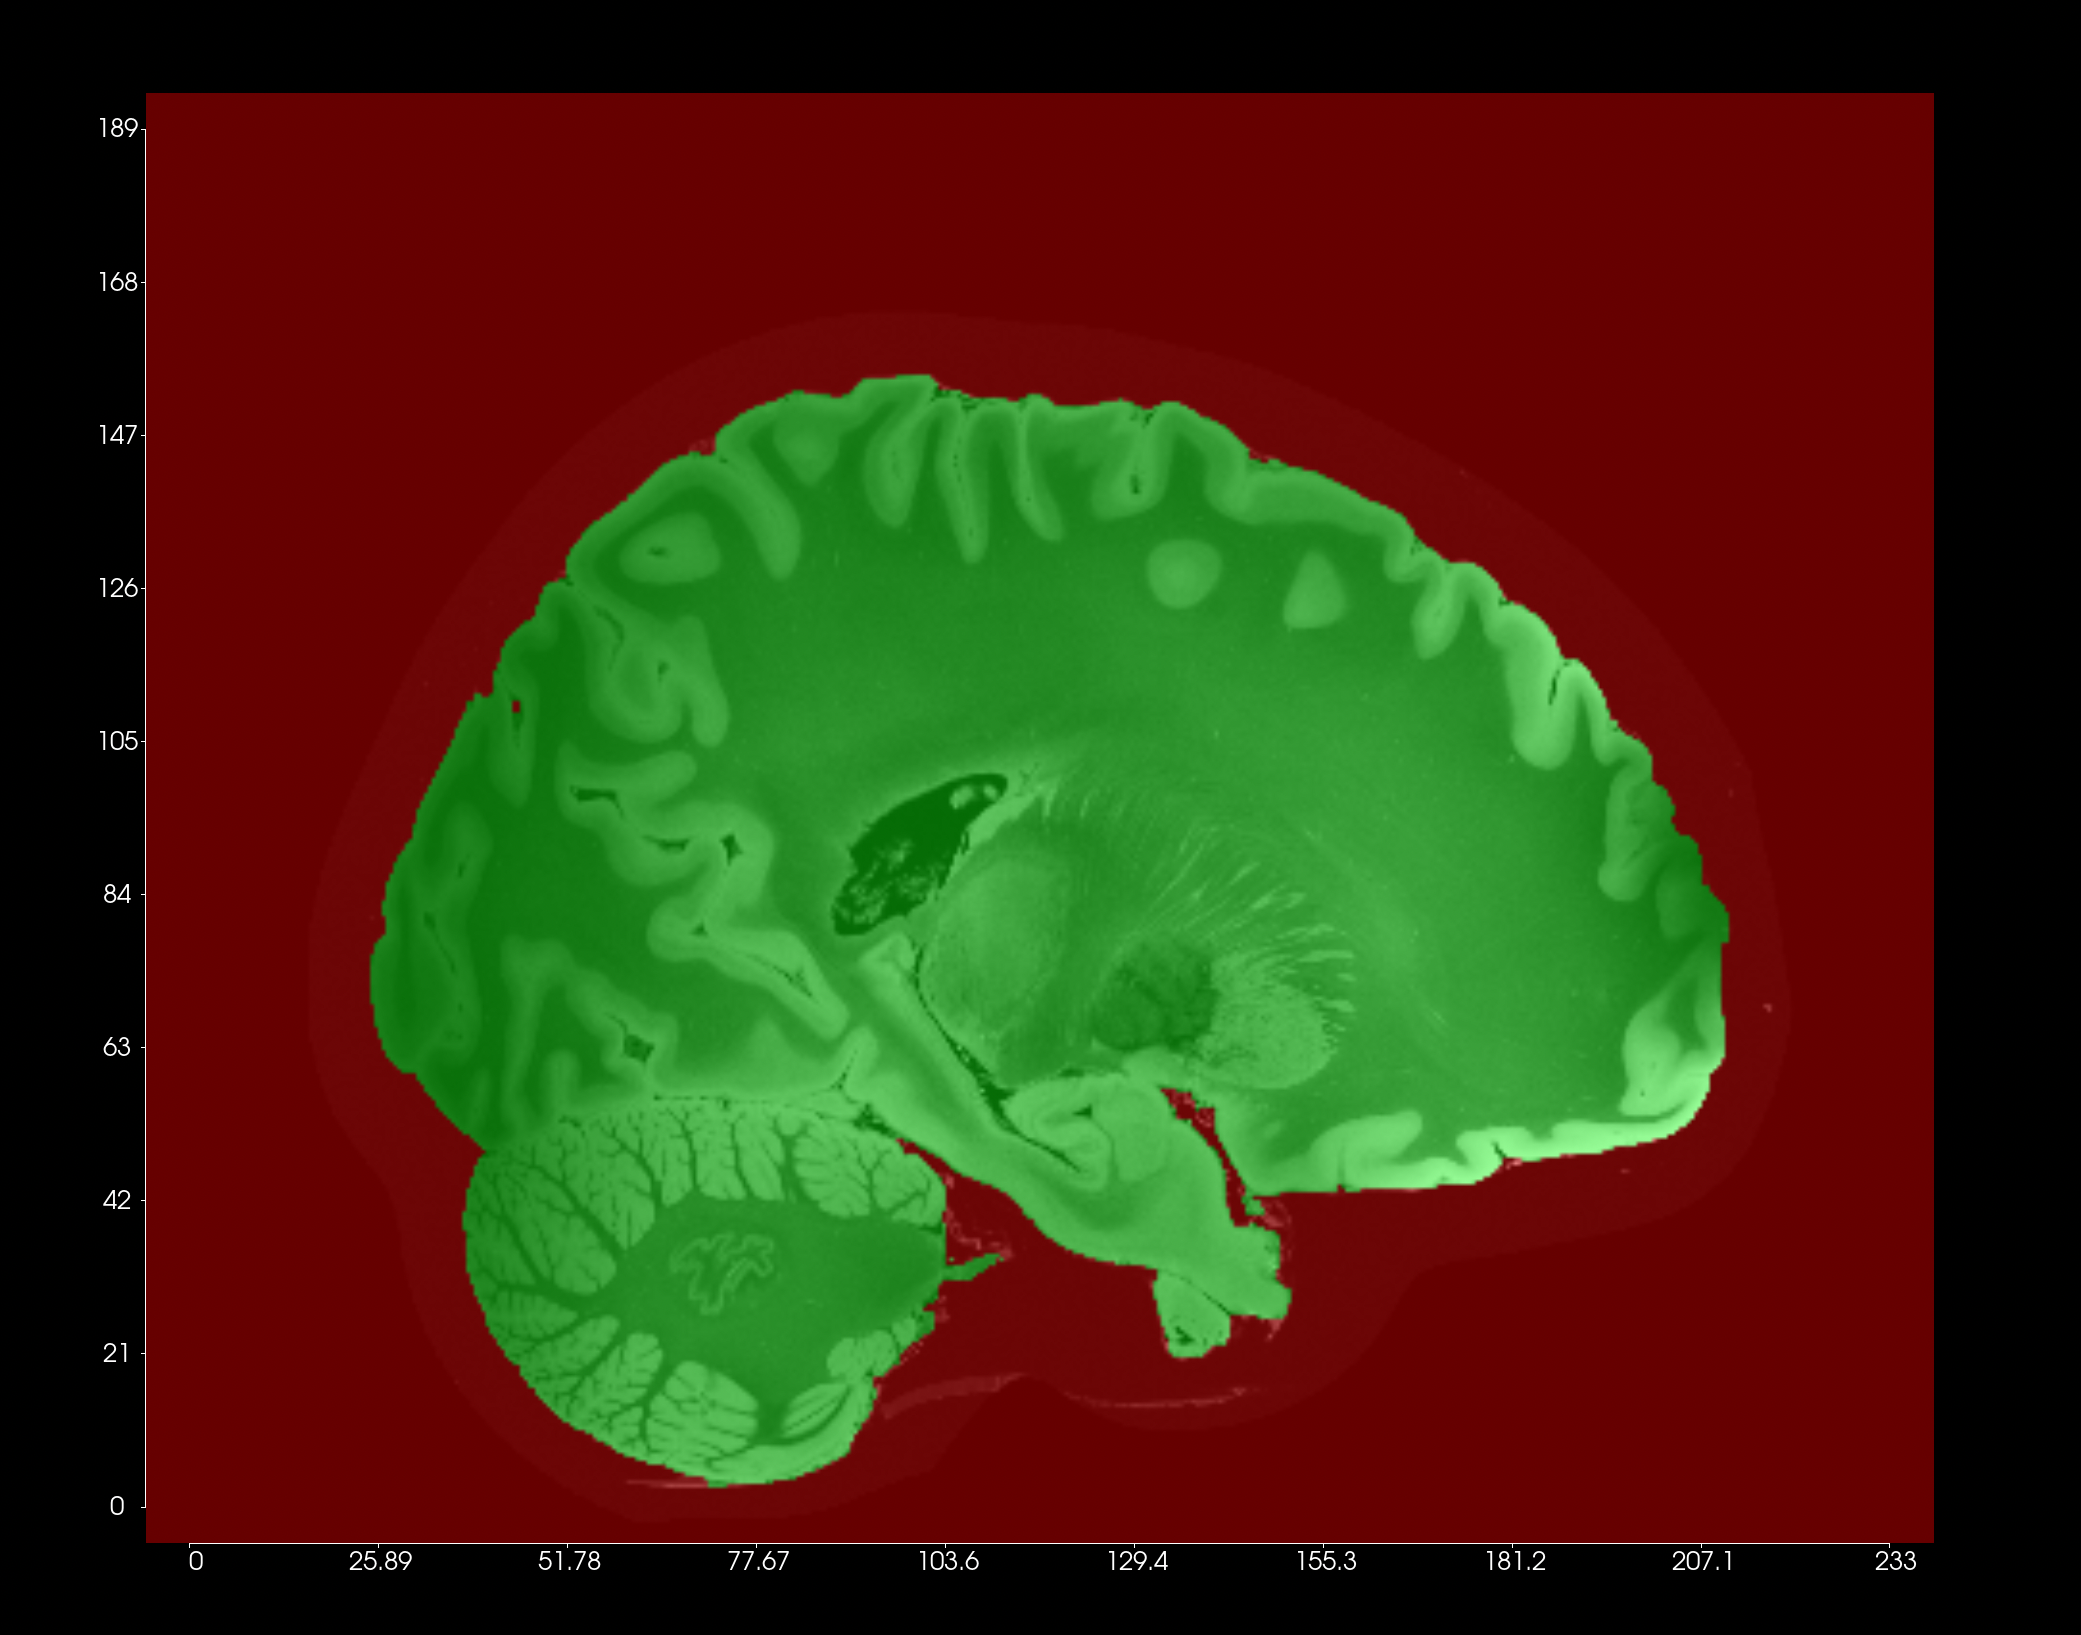
The mask is applied in all 3 Dimensions, providing a comprehensive view of the segmentation. Switch between the axial, sagittal and coronal orientations, and scroll through the range of slices, to see the results.
This process, can be repeated over and over, and the results refined until you are satisfied with the final result.
You can toggle the mask overlay on and off, to compare the original image to the segmentation results.
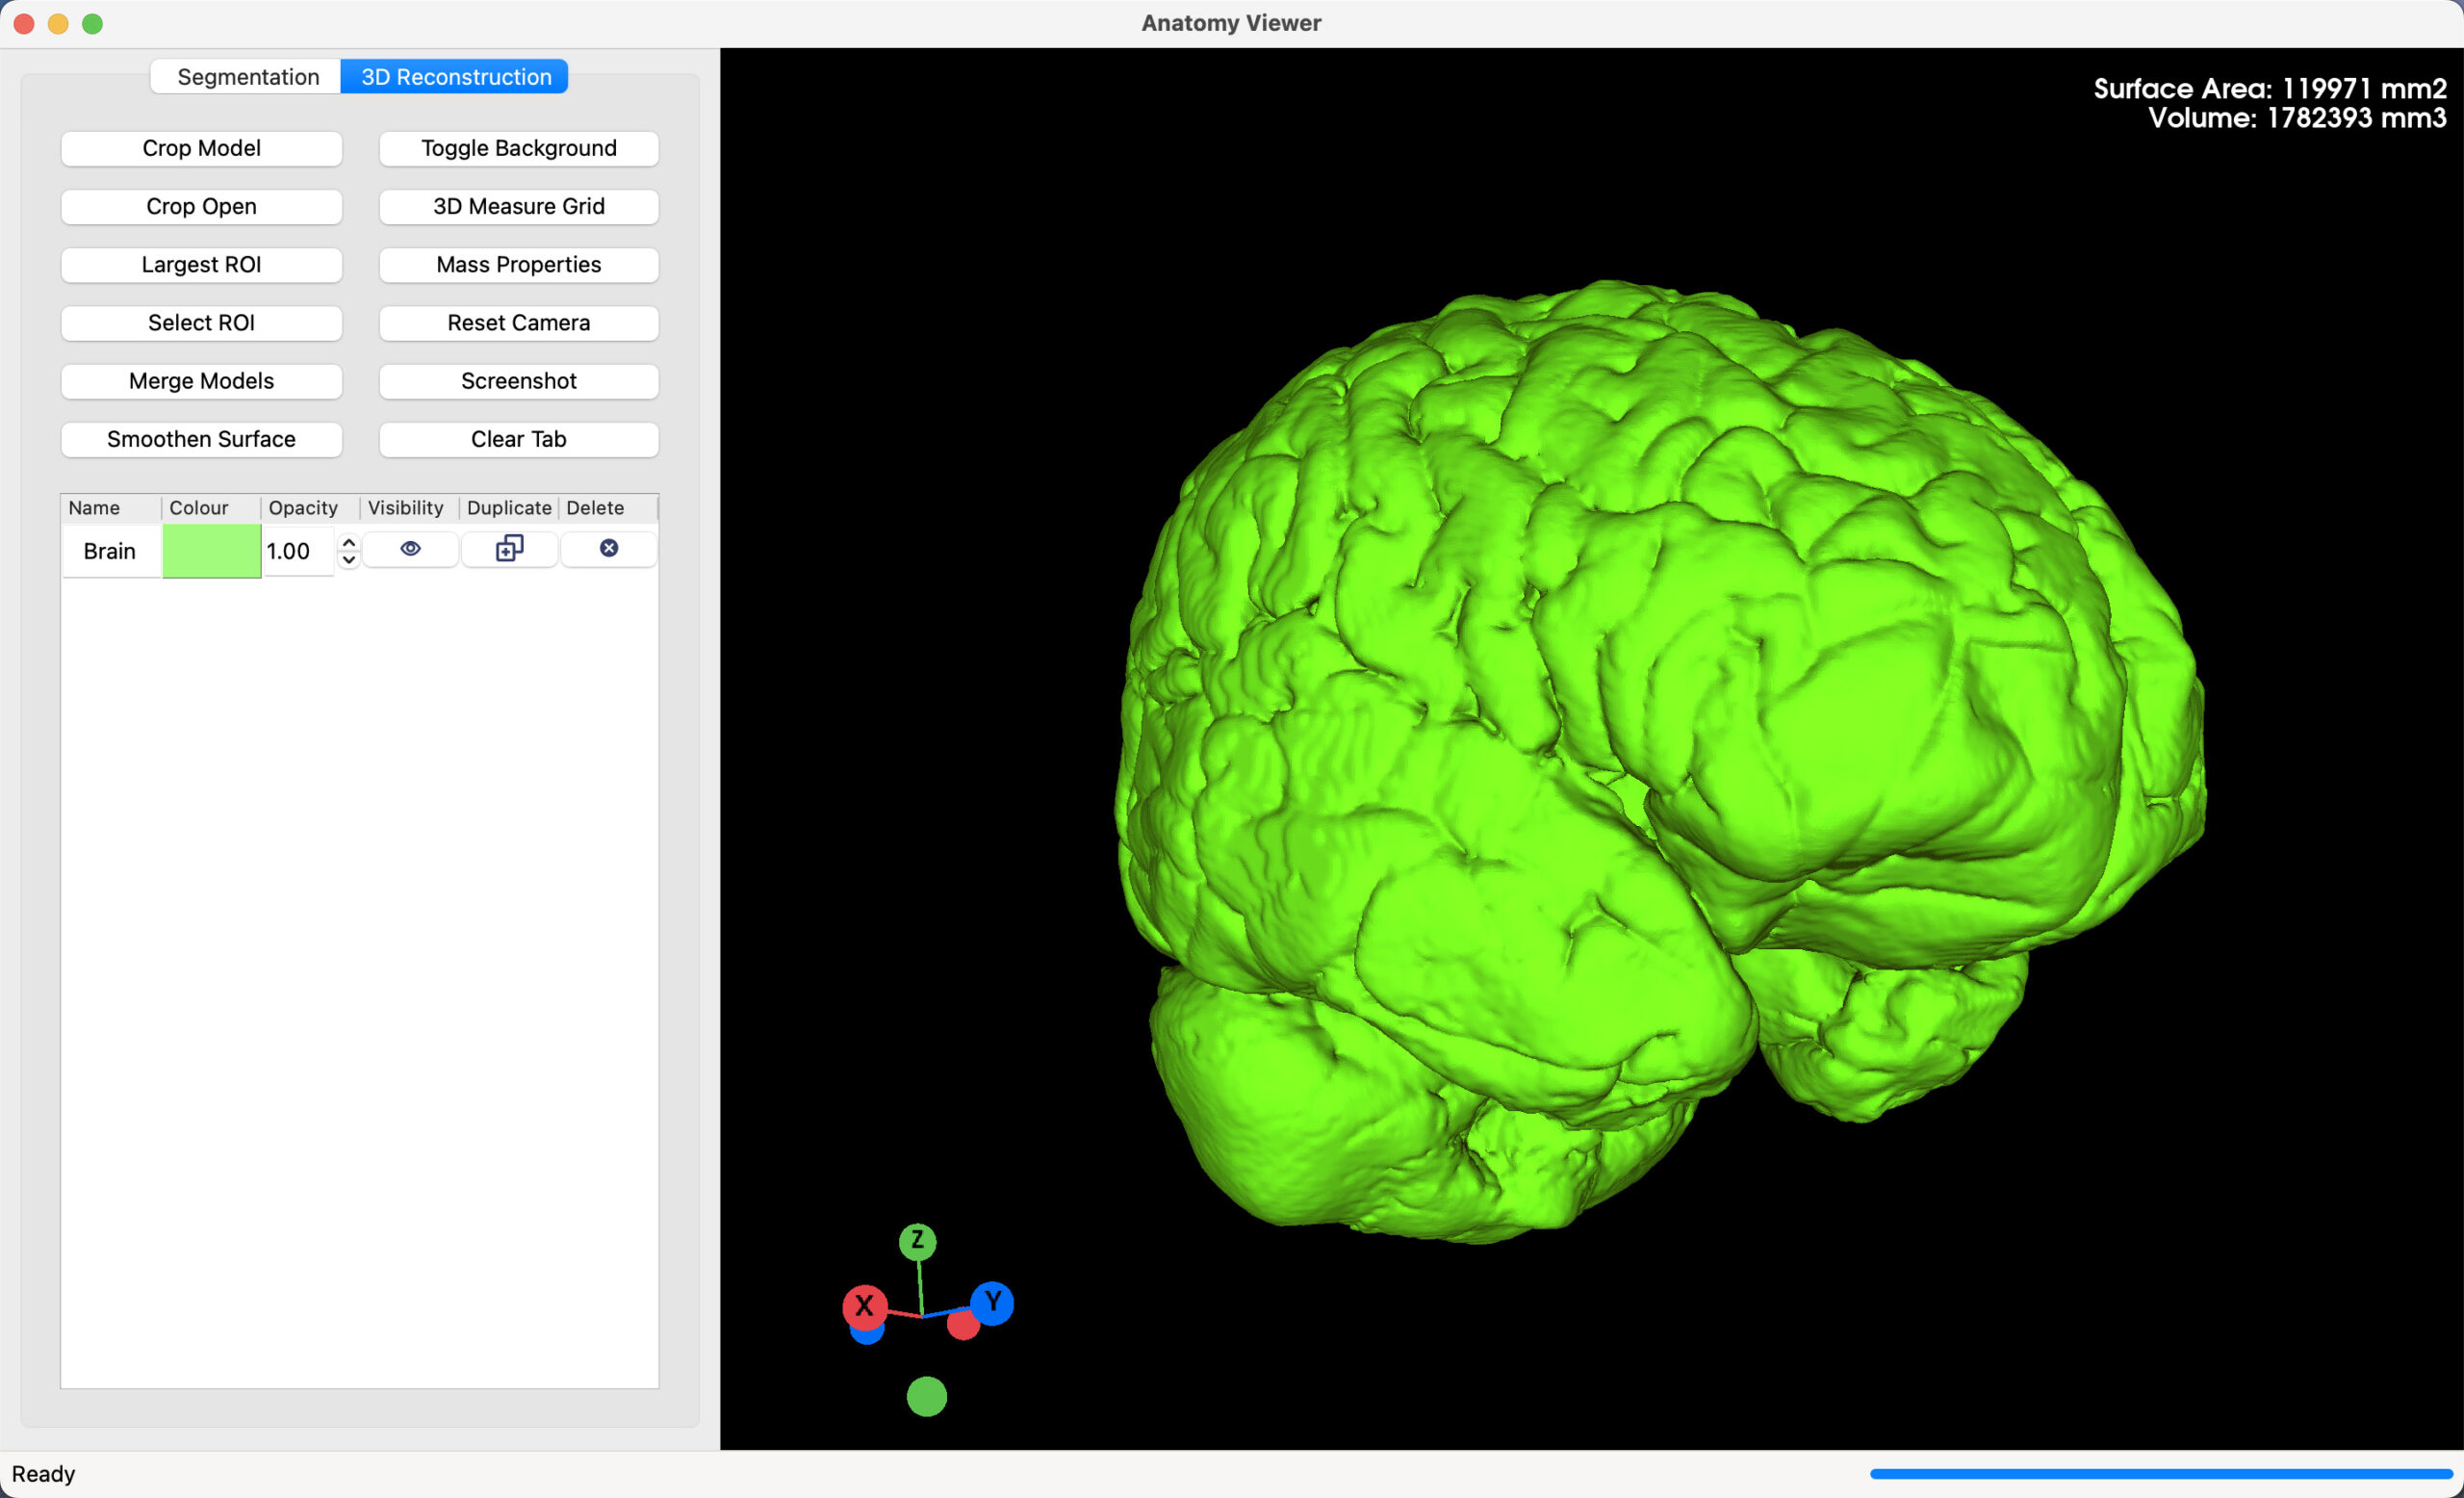
Generate 3D Model
Once you are happy with the results, select ‘Generate 3D’ to create a 3D model based on the green regions indicated in the mask.
The 3D Model generation is influenced by the Smoothing Iterations constant found above the segment button. This affects how much of a smoothing effect is applied on the final model. A range of 0-30 is provided. You can generate multiple models with different smoothing iteration values implemented, and compare the output to find the best final model.
Thresholding vs Watershed
While both thresholding and watershed segmentation can be used on both CT and MRI Images, each method has its strengths and weaknesses.
Thresholding
Strengths
- Excellent with CT Scans. The preset thresholding values provided for different tissue types, give great segmentation results with CT Images.
- Speed. Thresholding doesn’t require extensive input from the user, and a study can go from importing images to final 3D Models in a couple of minutes.
Weaknesses
- Control. Thresholding doesn’t provide the user with a lot of control of the segmentation process. Each part of the image that matches a threshold value is picked out, even if it is in areas that the user doesn’t want. These areas would have to be excluded in the final 3D Model.
- MRI Scans. While experimental preset thresholding values have been provided for MRI Scans, these values do not always work well, and segmentation can be frustrating.
Watershed
Strengths
- Control. This method provides complete control over the segmentation process. As the user can manually pick out areas that they want excluded from the final model, the user can dictate the make-up of the final 3D model.
- Good with CT and MRI Scans. Watershed segmentation works great with both MRI and CT scans, providing a universal segmentation method.
Weaknesses
- Can be time-consuming. With greater control and more user input, more time is spent refining the segmentation. If the area you want to pick out is very specific, or the image data provided is noisy, the watershed segmentation can take more time than expected for you to end up with a model that you are happy with.
Conclusion
All together, thresholding and watershed segmentation provide a comprehensive set of image segmentation methods that can be used on almost any case. Based on the strengths and weaknesses above, you can choose the method best suited to your needs. Alternatively, you can try both and see which method produces the best results.