Importing Images
Vista accepts images in two formats: DICOM & NIfTI. The steps to follow when importing images depends on what type of file(s) you are working with. The guides below outline the steps to follow, based on image format.
DICOM Images
The import process happens in three steps:
- Select Folder Location.
- Select Series for Import.
- Images are loaded onto the Rendering Canvas.
First, select 'Import DICOM Series'. A dialog box will open, from which you can select the folder containing DICOM images to import. Ensure that the folder selected only contains DICOM images. If the selected folder contains files of a format other than DICOM, an error will be raised.
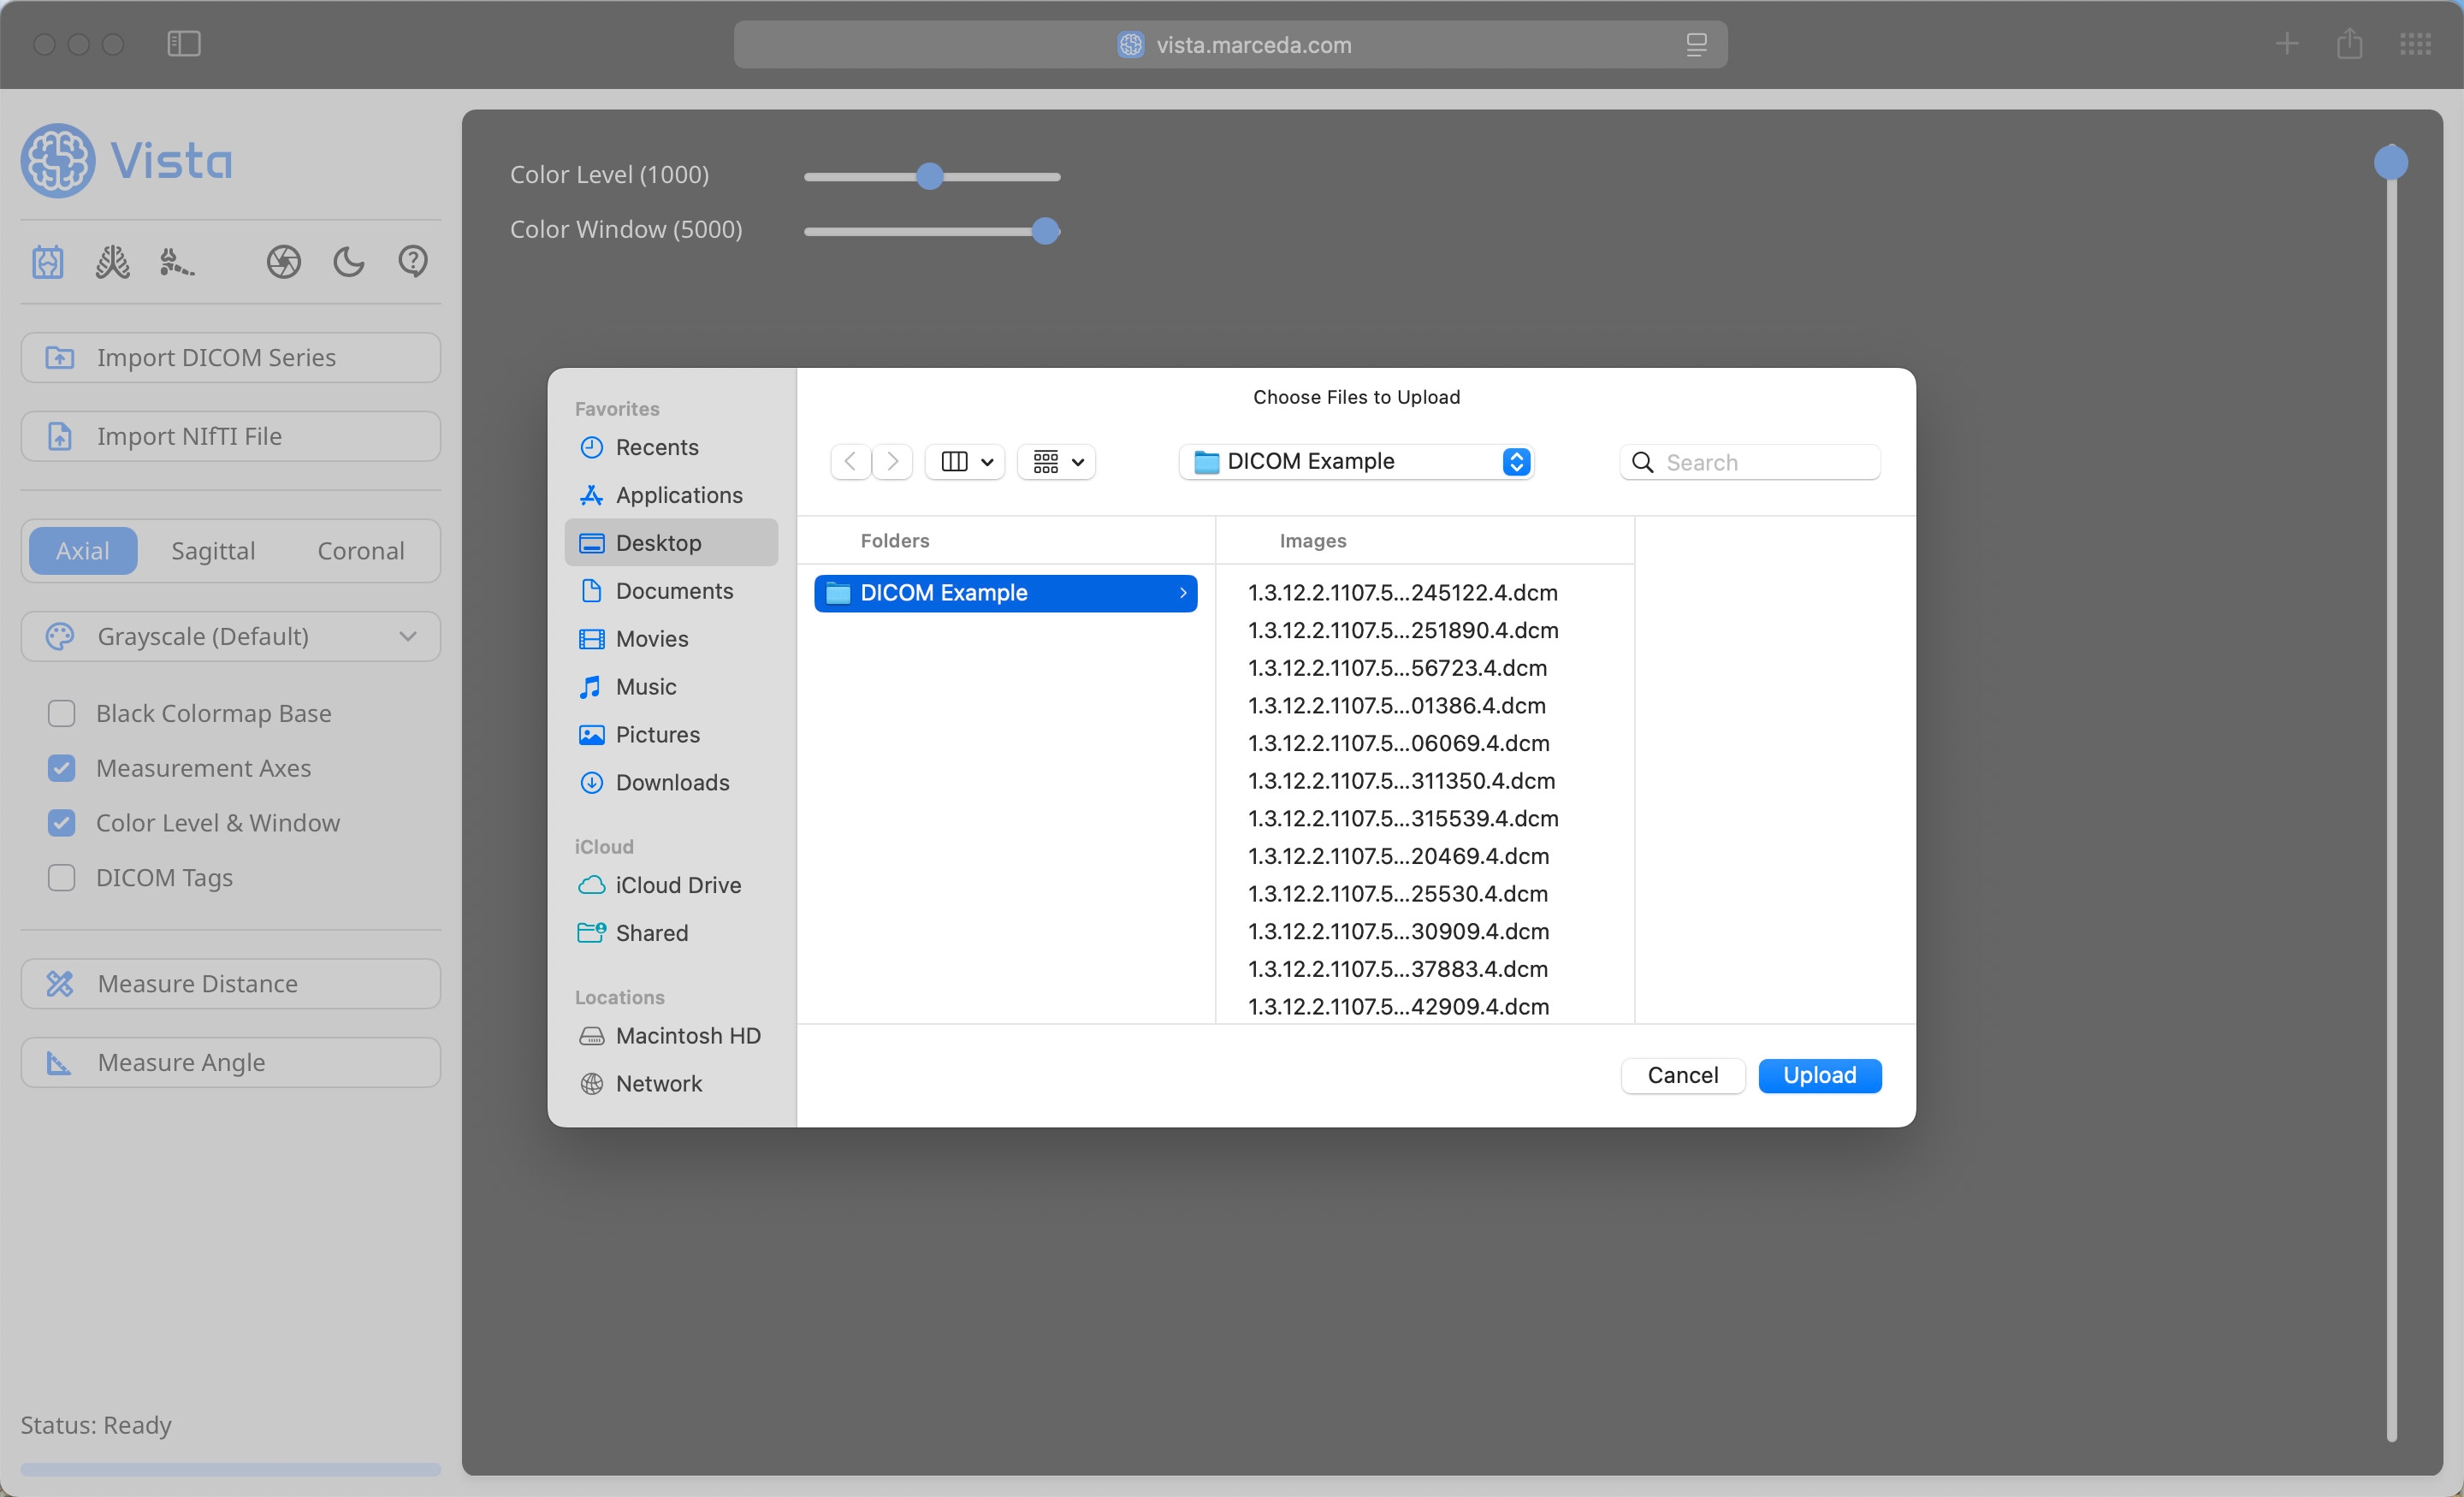
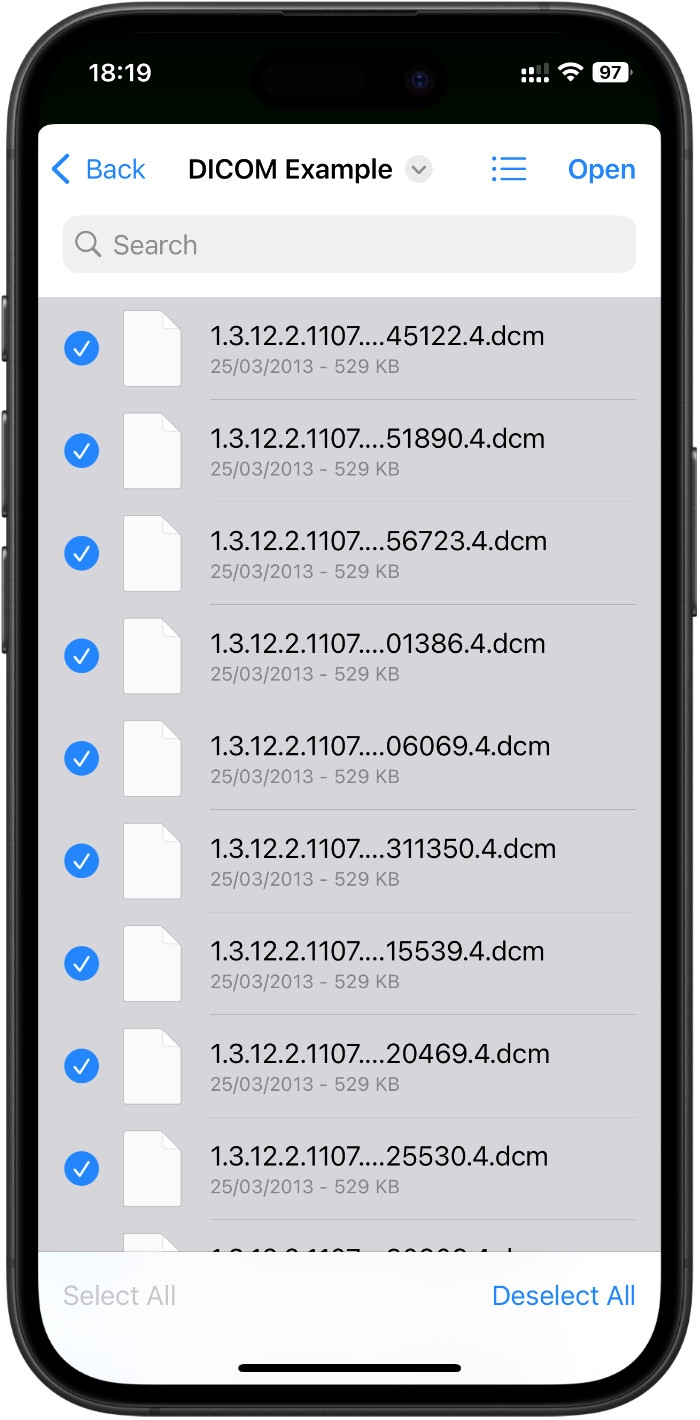
Next, Vista will group all Images in the selected folder into their respective series, and give you a preview of each, as illustrated in the example below. The table includes a summary of each series including the number of images, patient names, study description, series description and modality. Select the checkbox in the row containing the series you wish to import, and click the 'Import' button.
Note that if only one series is detected in the folder you select, this step will be skipped.

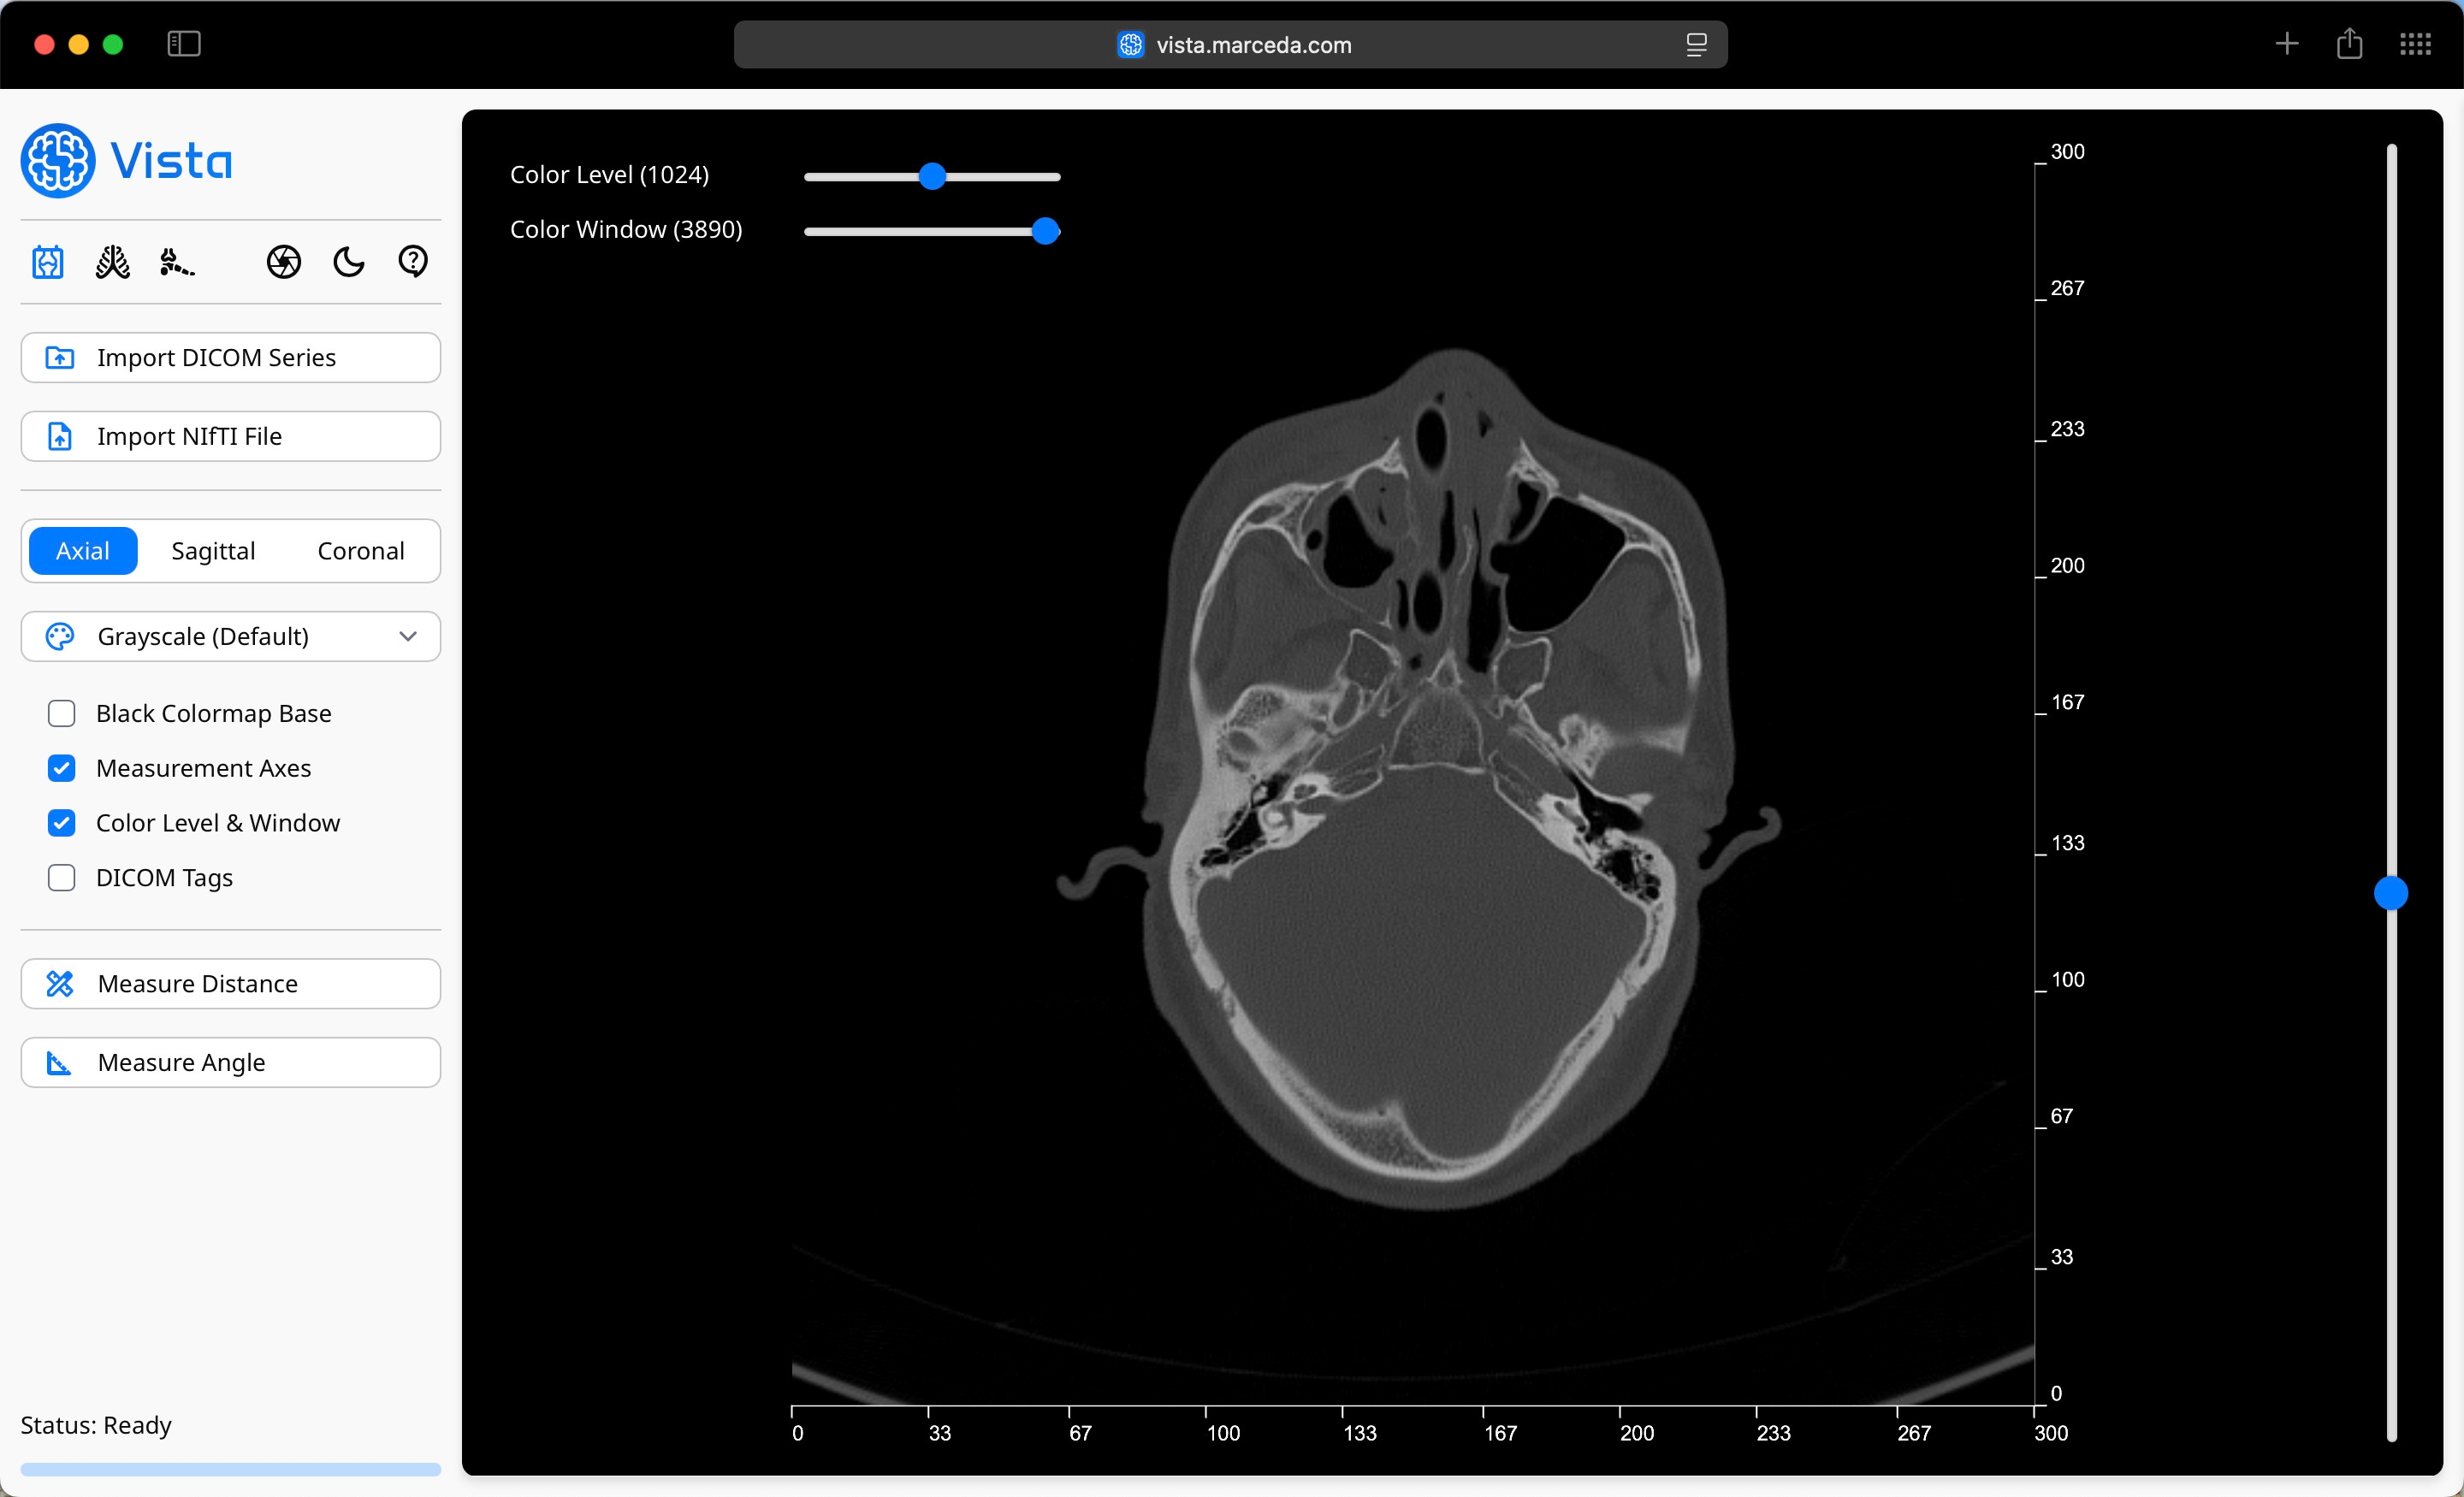
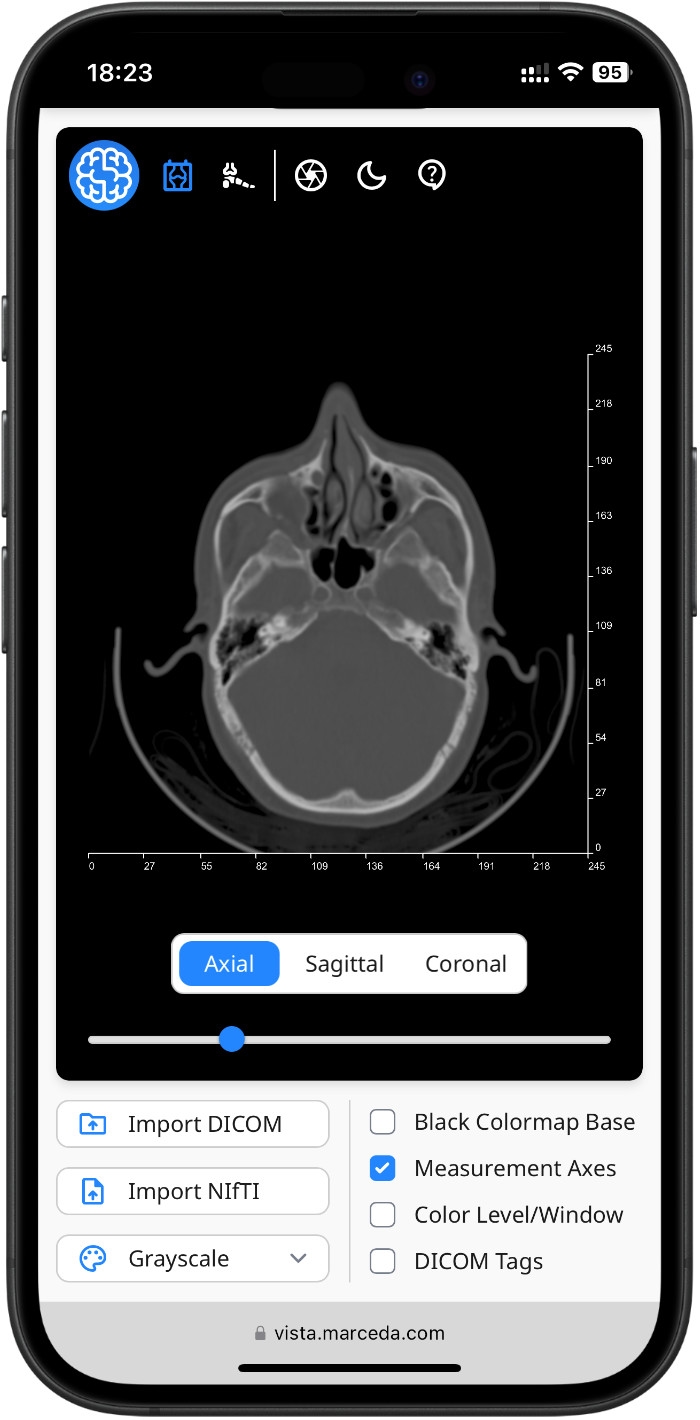
Slices in the original orientation will be loaded onto the Rendering Canvas in grayscale. Drag the slider on the right of the Rendering Canvas, either up or down, to scroll through all the slices in the series. Refer to the Interaction Section to learn how to pan or zoom in and out, based on your device.
X & Y axes, featuring 10 equally spaced points, are added onto the length and width of each slice. Each point includes the distance from the origin.
Use the Axial, Sagittal and Coronal buttons to switch between orientations.
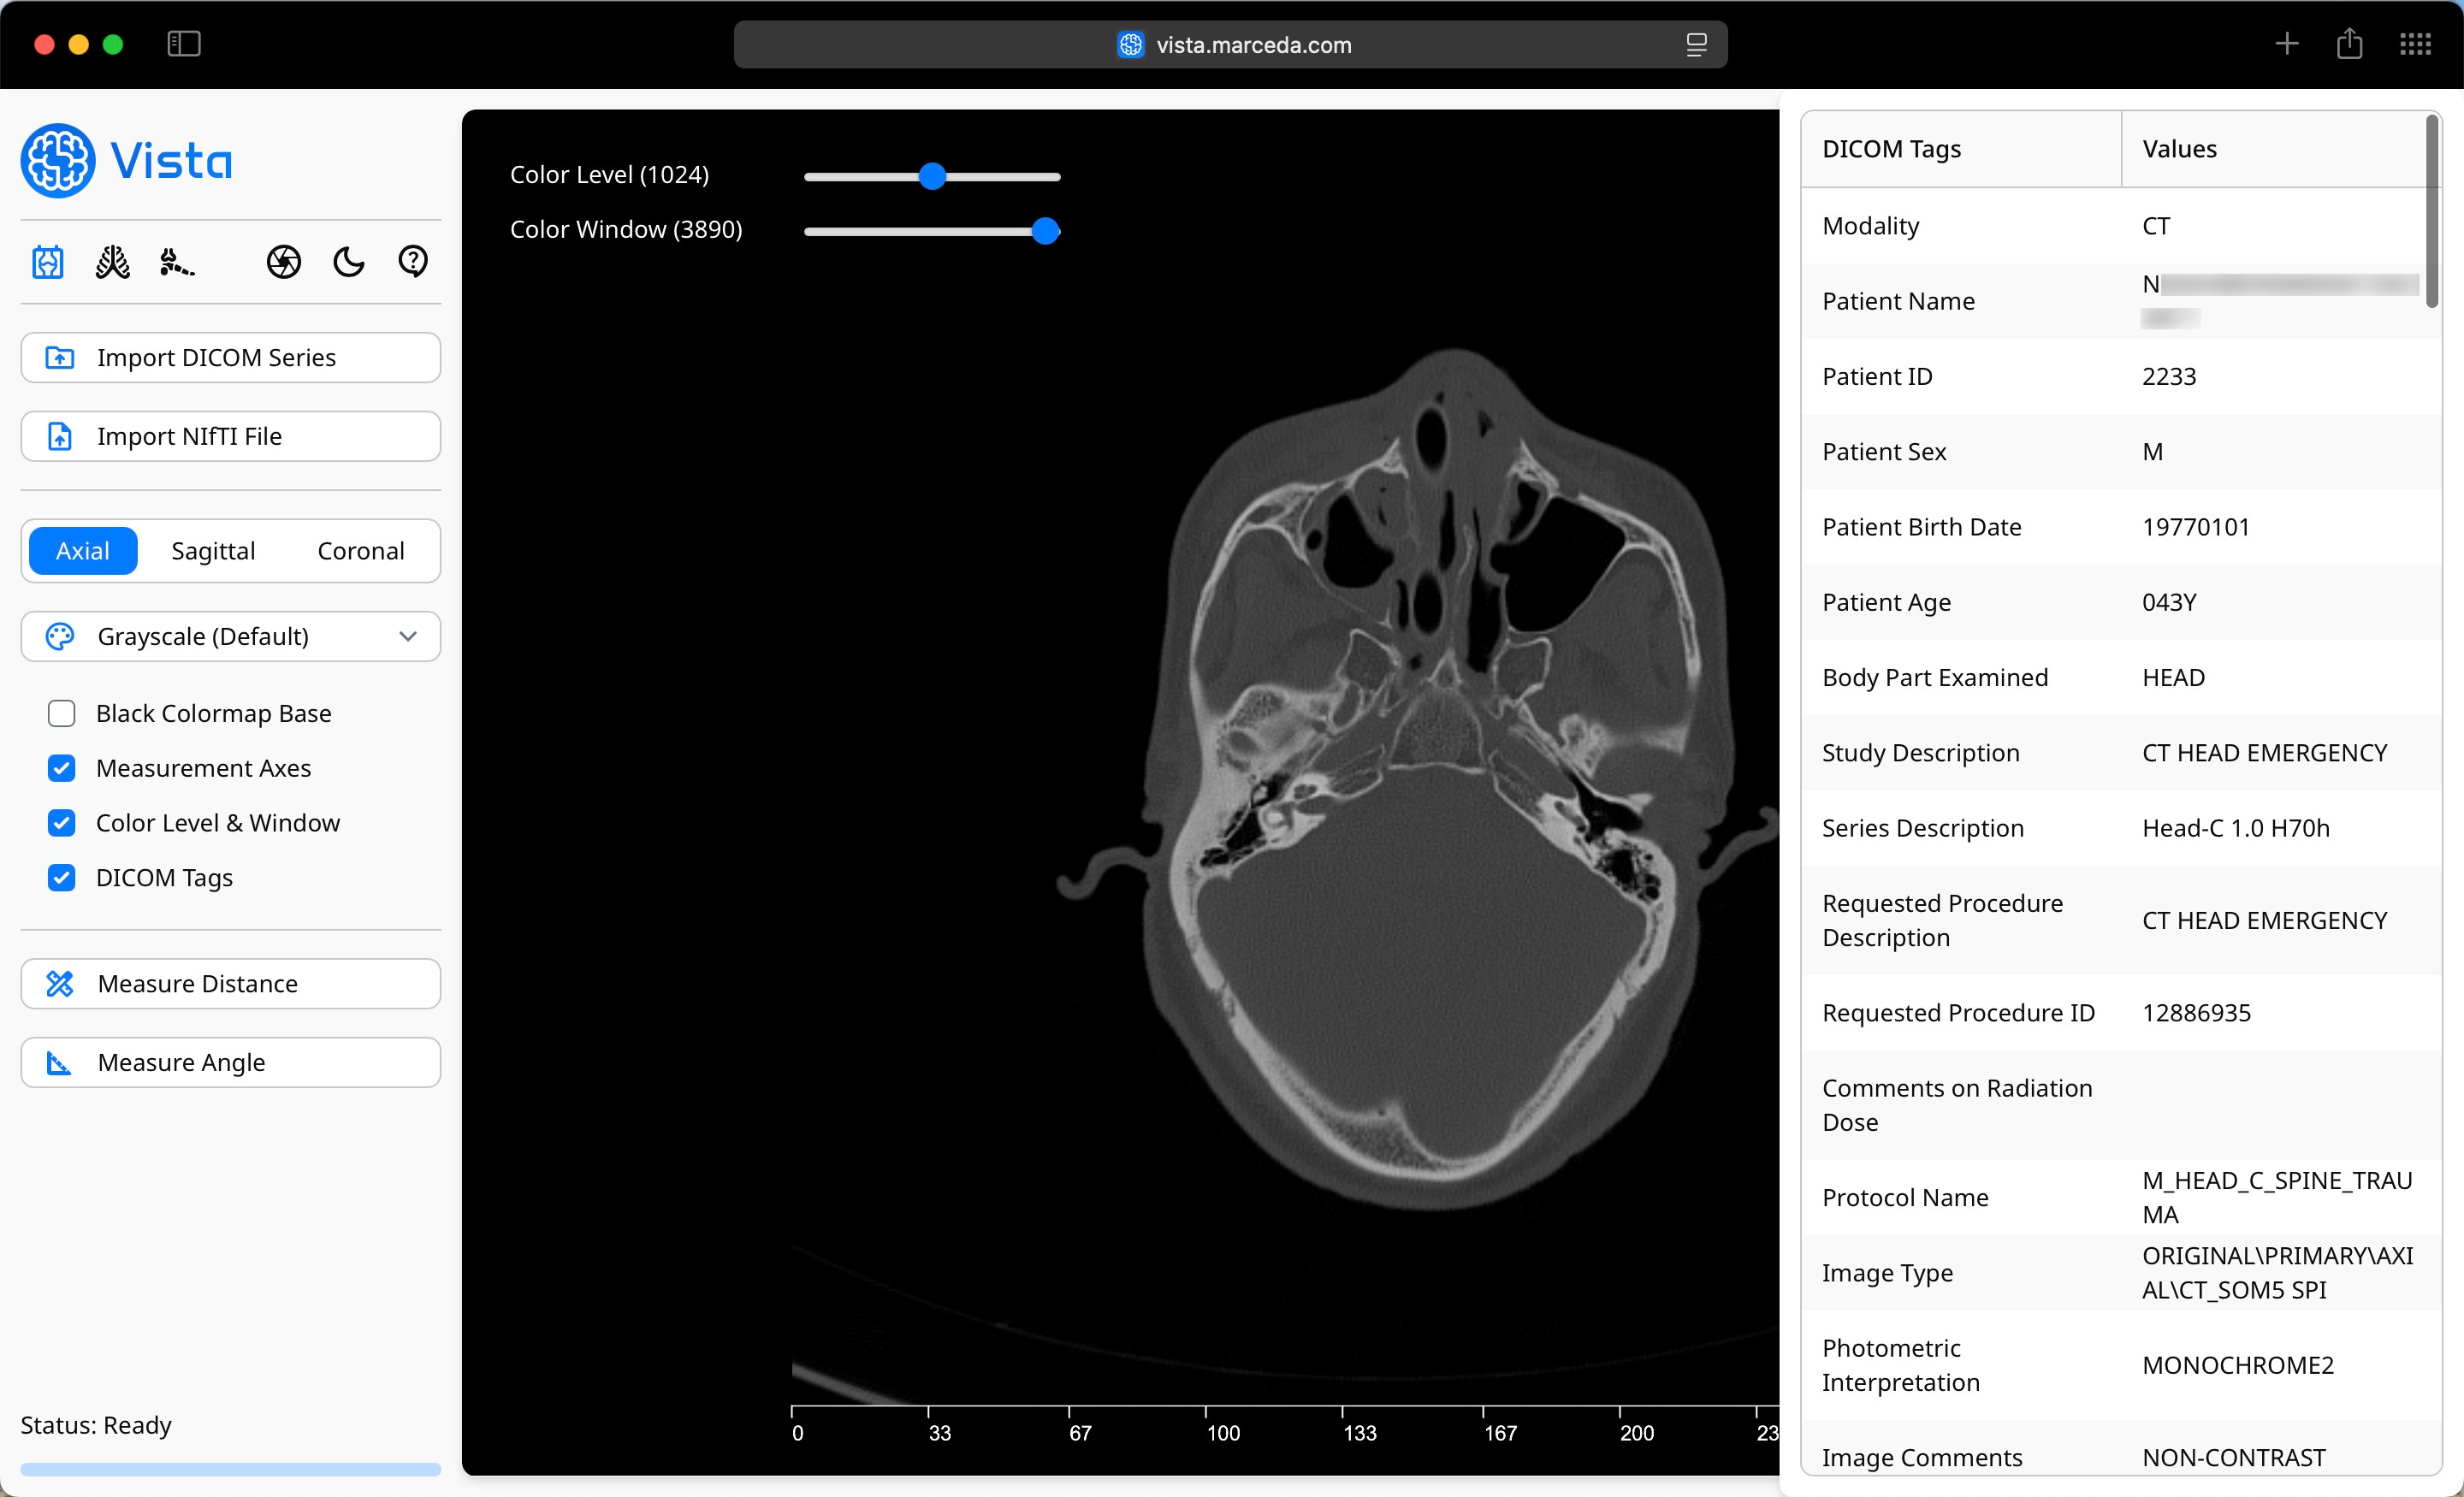
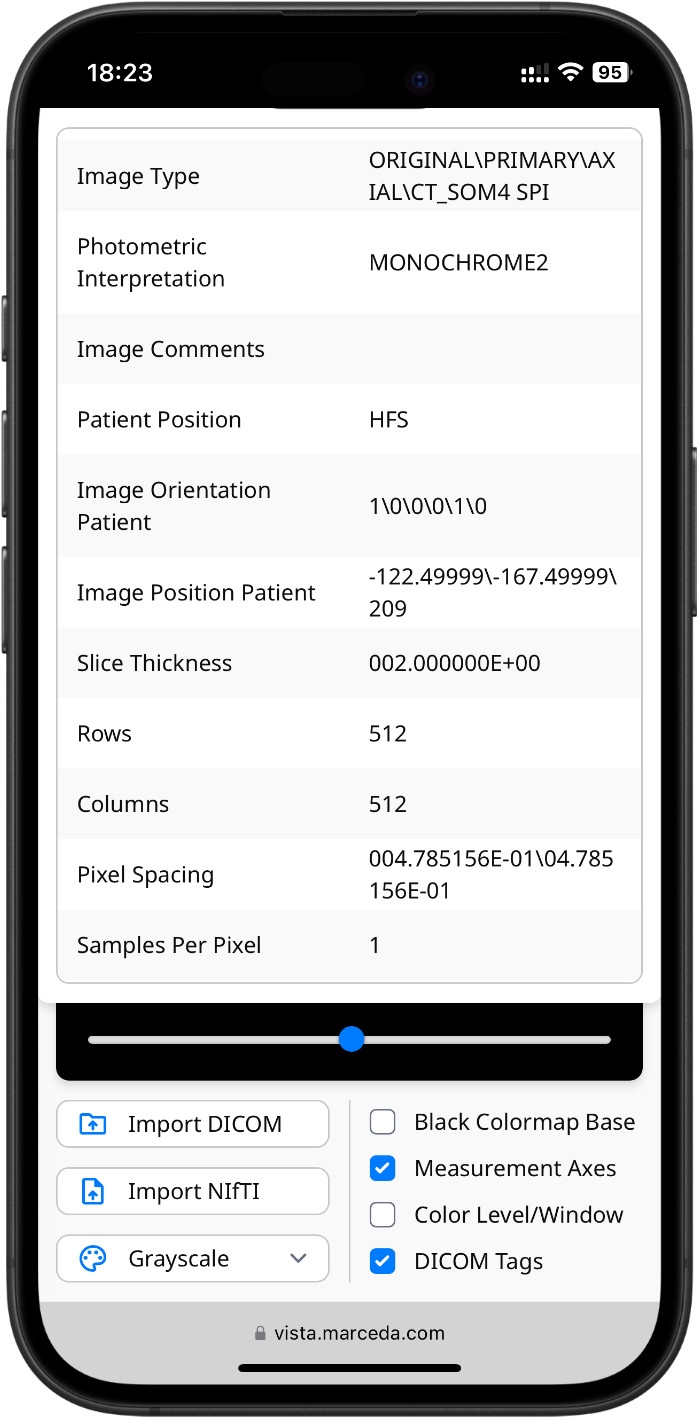
Finally, an extensive list of DICOM Tags extracted from the imported images, is put together, and displayed in a table found to the right of the window. It is hidden by default. Select the DICOM Tags checkbox to bring it into view, and de-select to hide it.
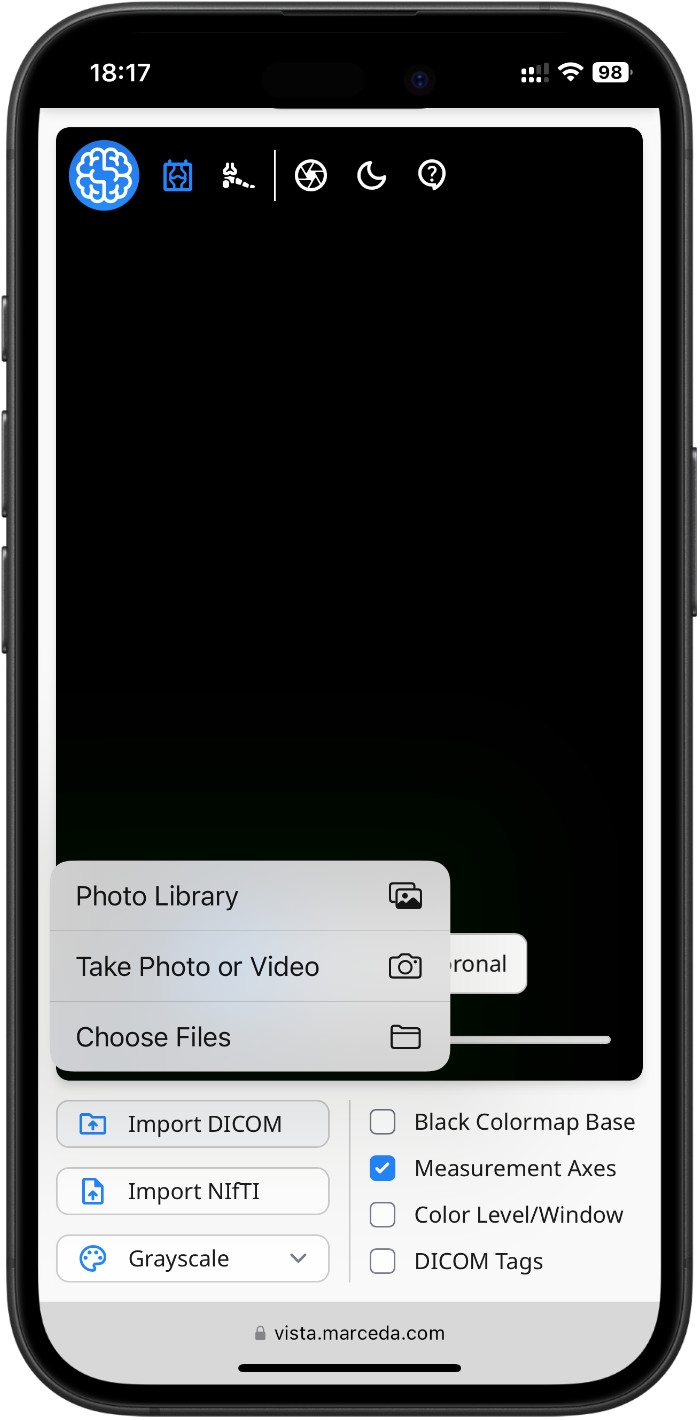
The process of importing DICOM Images on smartphones and tablets, follows the exact same steps described above. The only difference is the placement of the relevant buttons on the screen. Refer to the Interface Overview Section if you need help.
NIfTI
The NIfTI import process is much simpler. It follows two steps:
- Select File Location.
- Images are loaded onto the Rendering Canvas.
First, select 'Import NIfTI File'. A dialog box will open, from which you can select the NIfTI File. Note that in this case, Vista only accepts either .nii or.nii.gz file extensions.
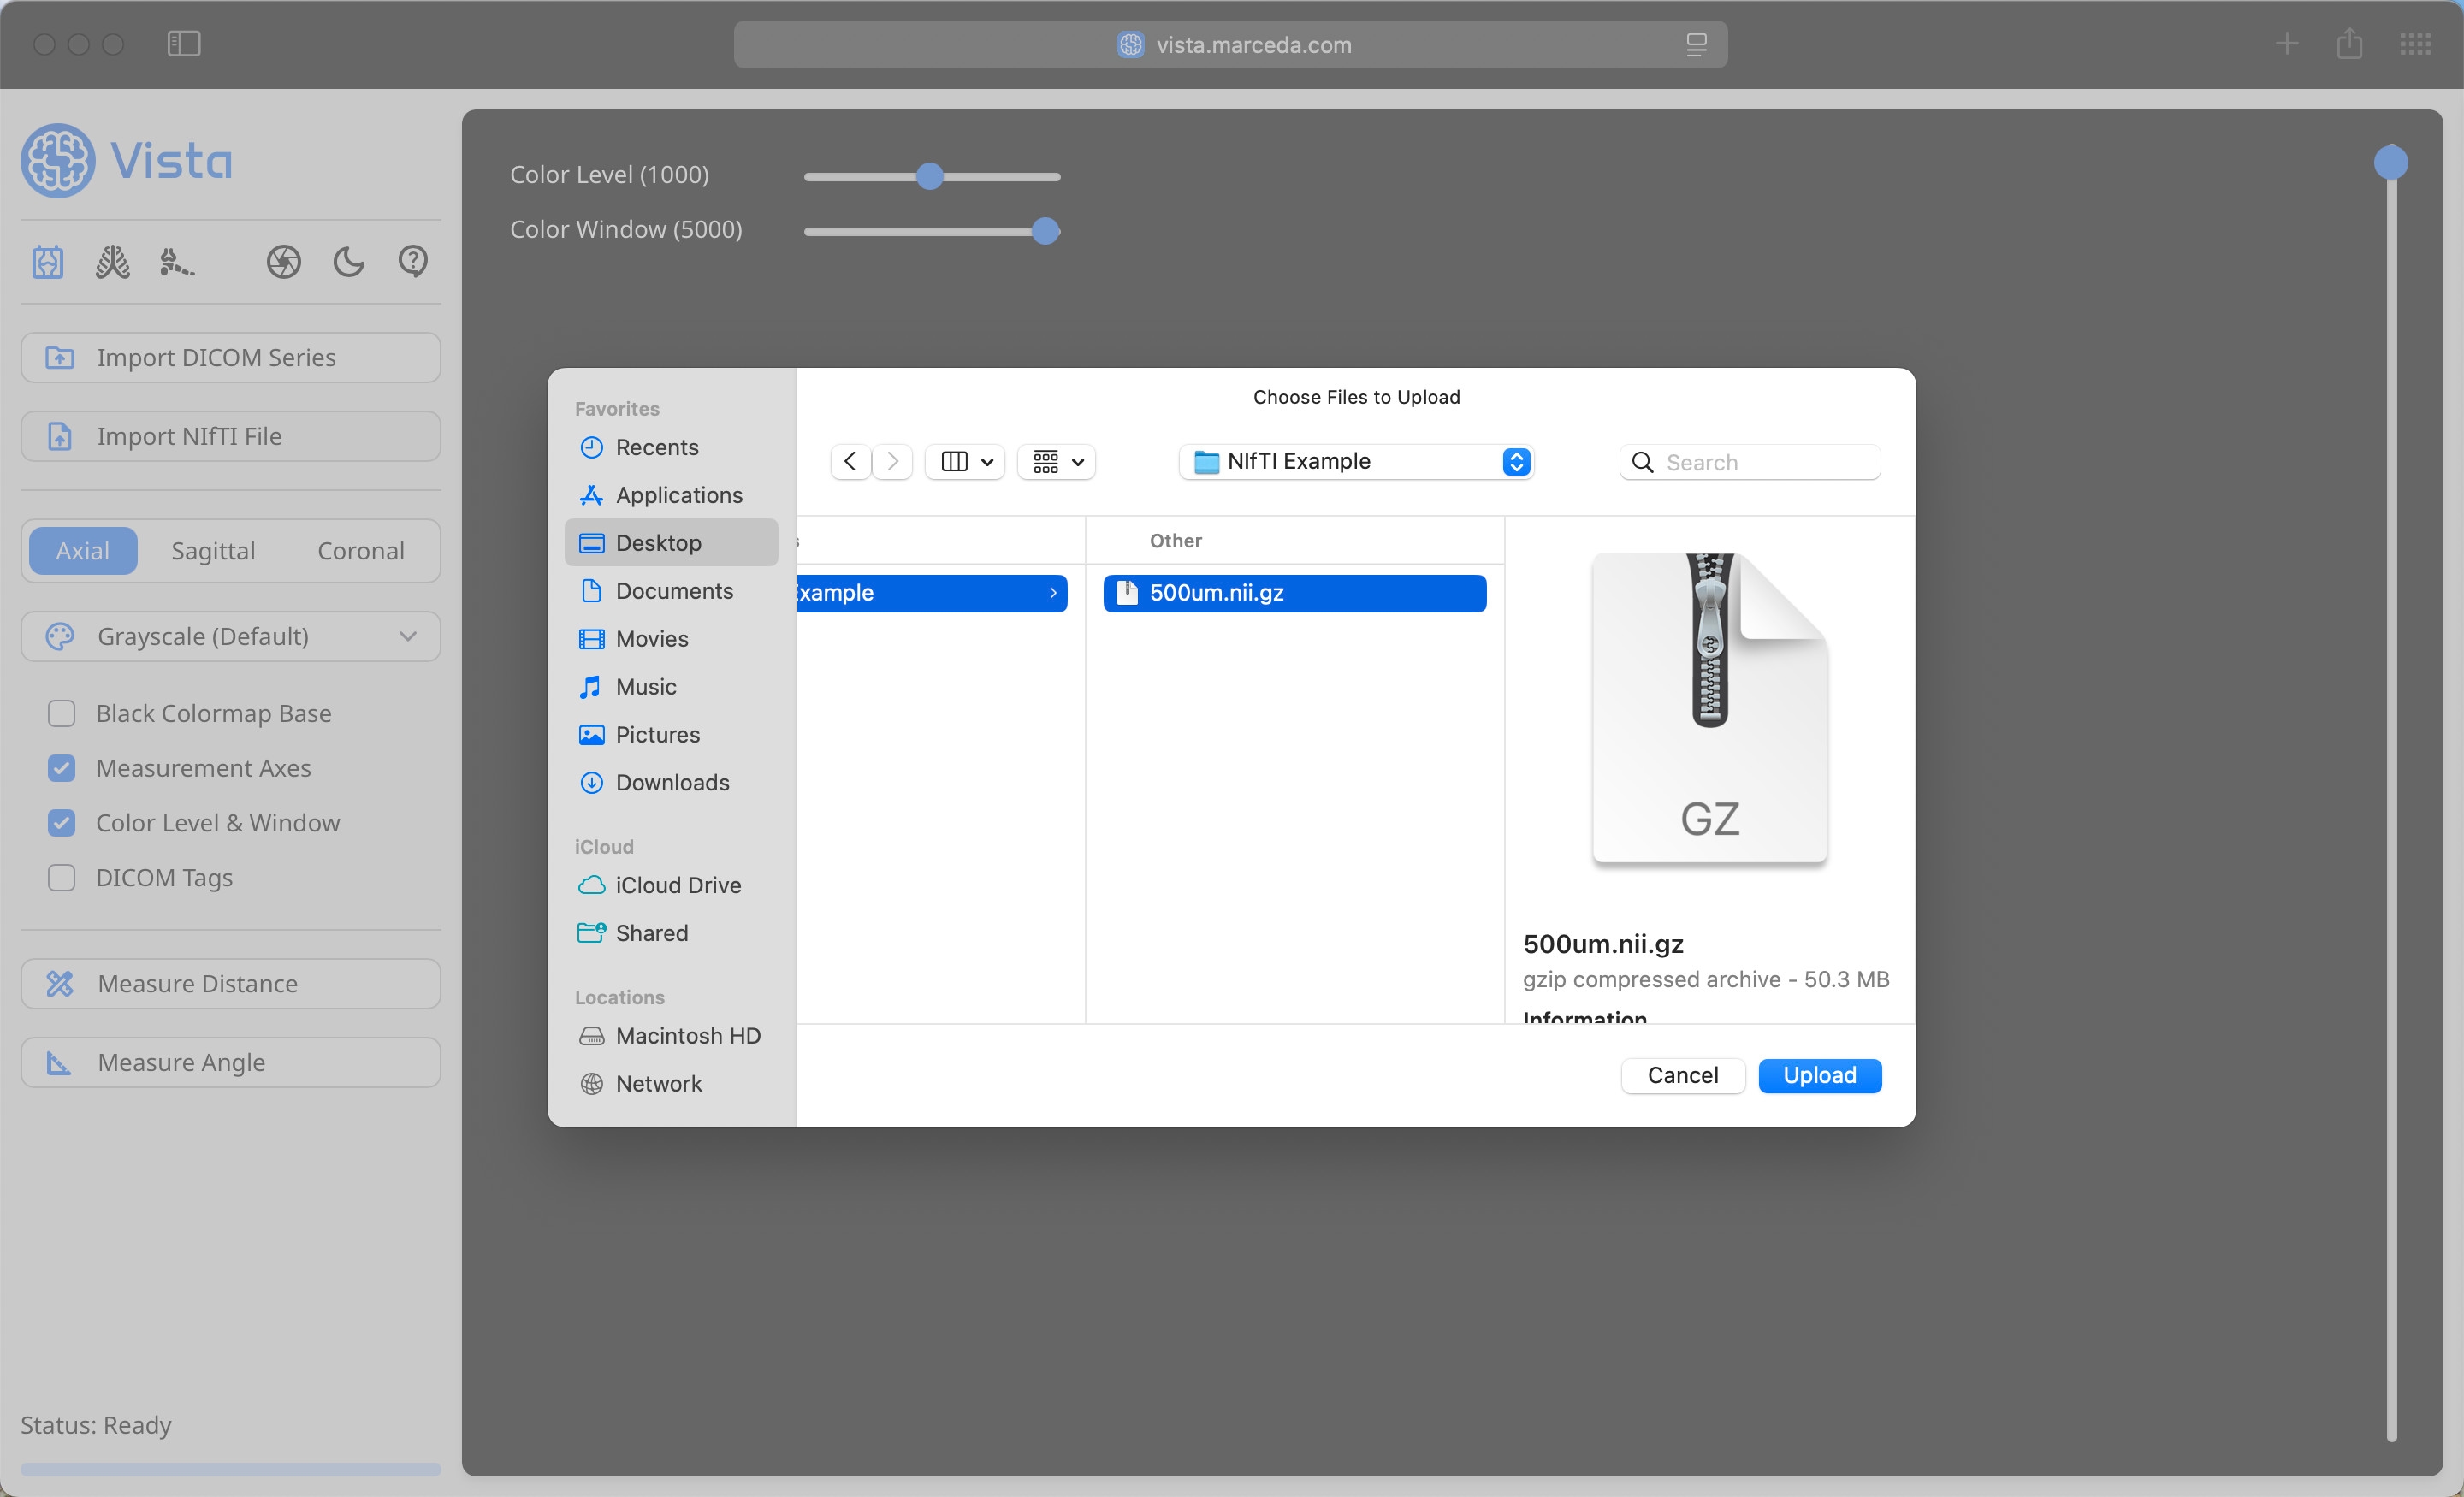
Once selected, Vista will load the slices in the original orientation onto the Rendering Canvas in grayscale. Interact with the images as described in the 'DICOM Images' section above.