Isosurface Creation
In the Geometry Viewer profile, you can create 3D surfaces of different organs, bones or blood vessels from your image data. Simply click the 'Create Isosurface' button, and an Isosurface (3D surface) will be generated from your data. The 3D surface is a result of a contour generated through the image data, based on an Isosurface Value.
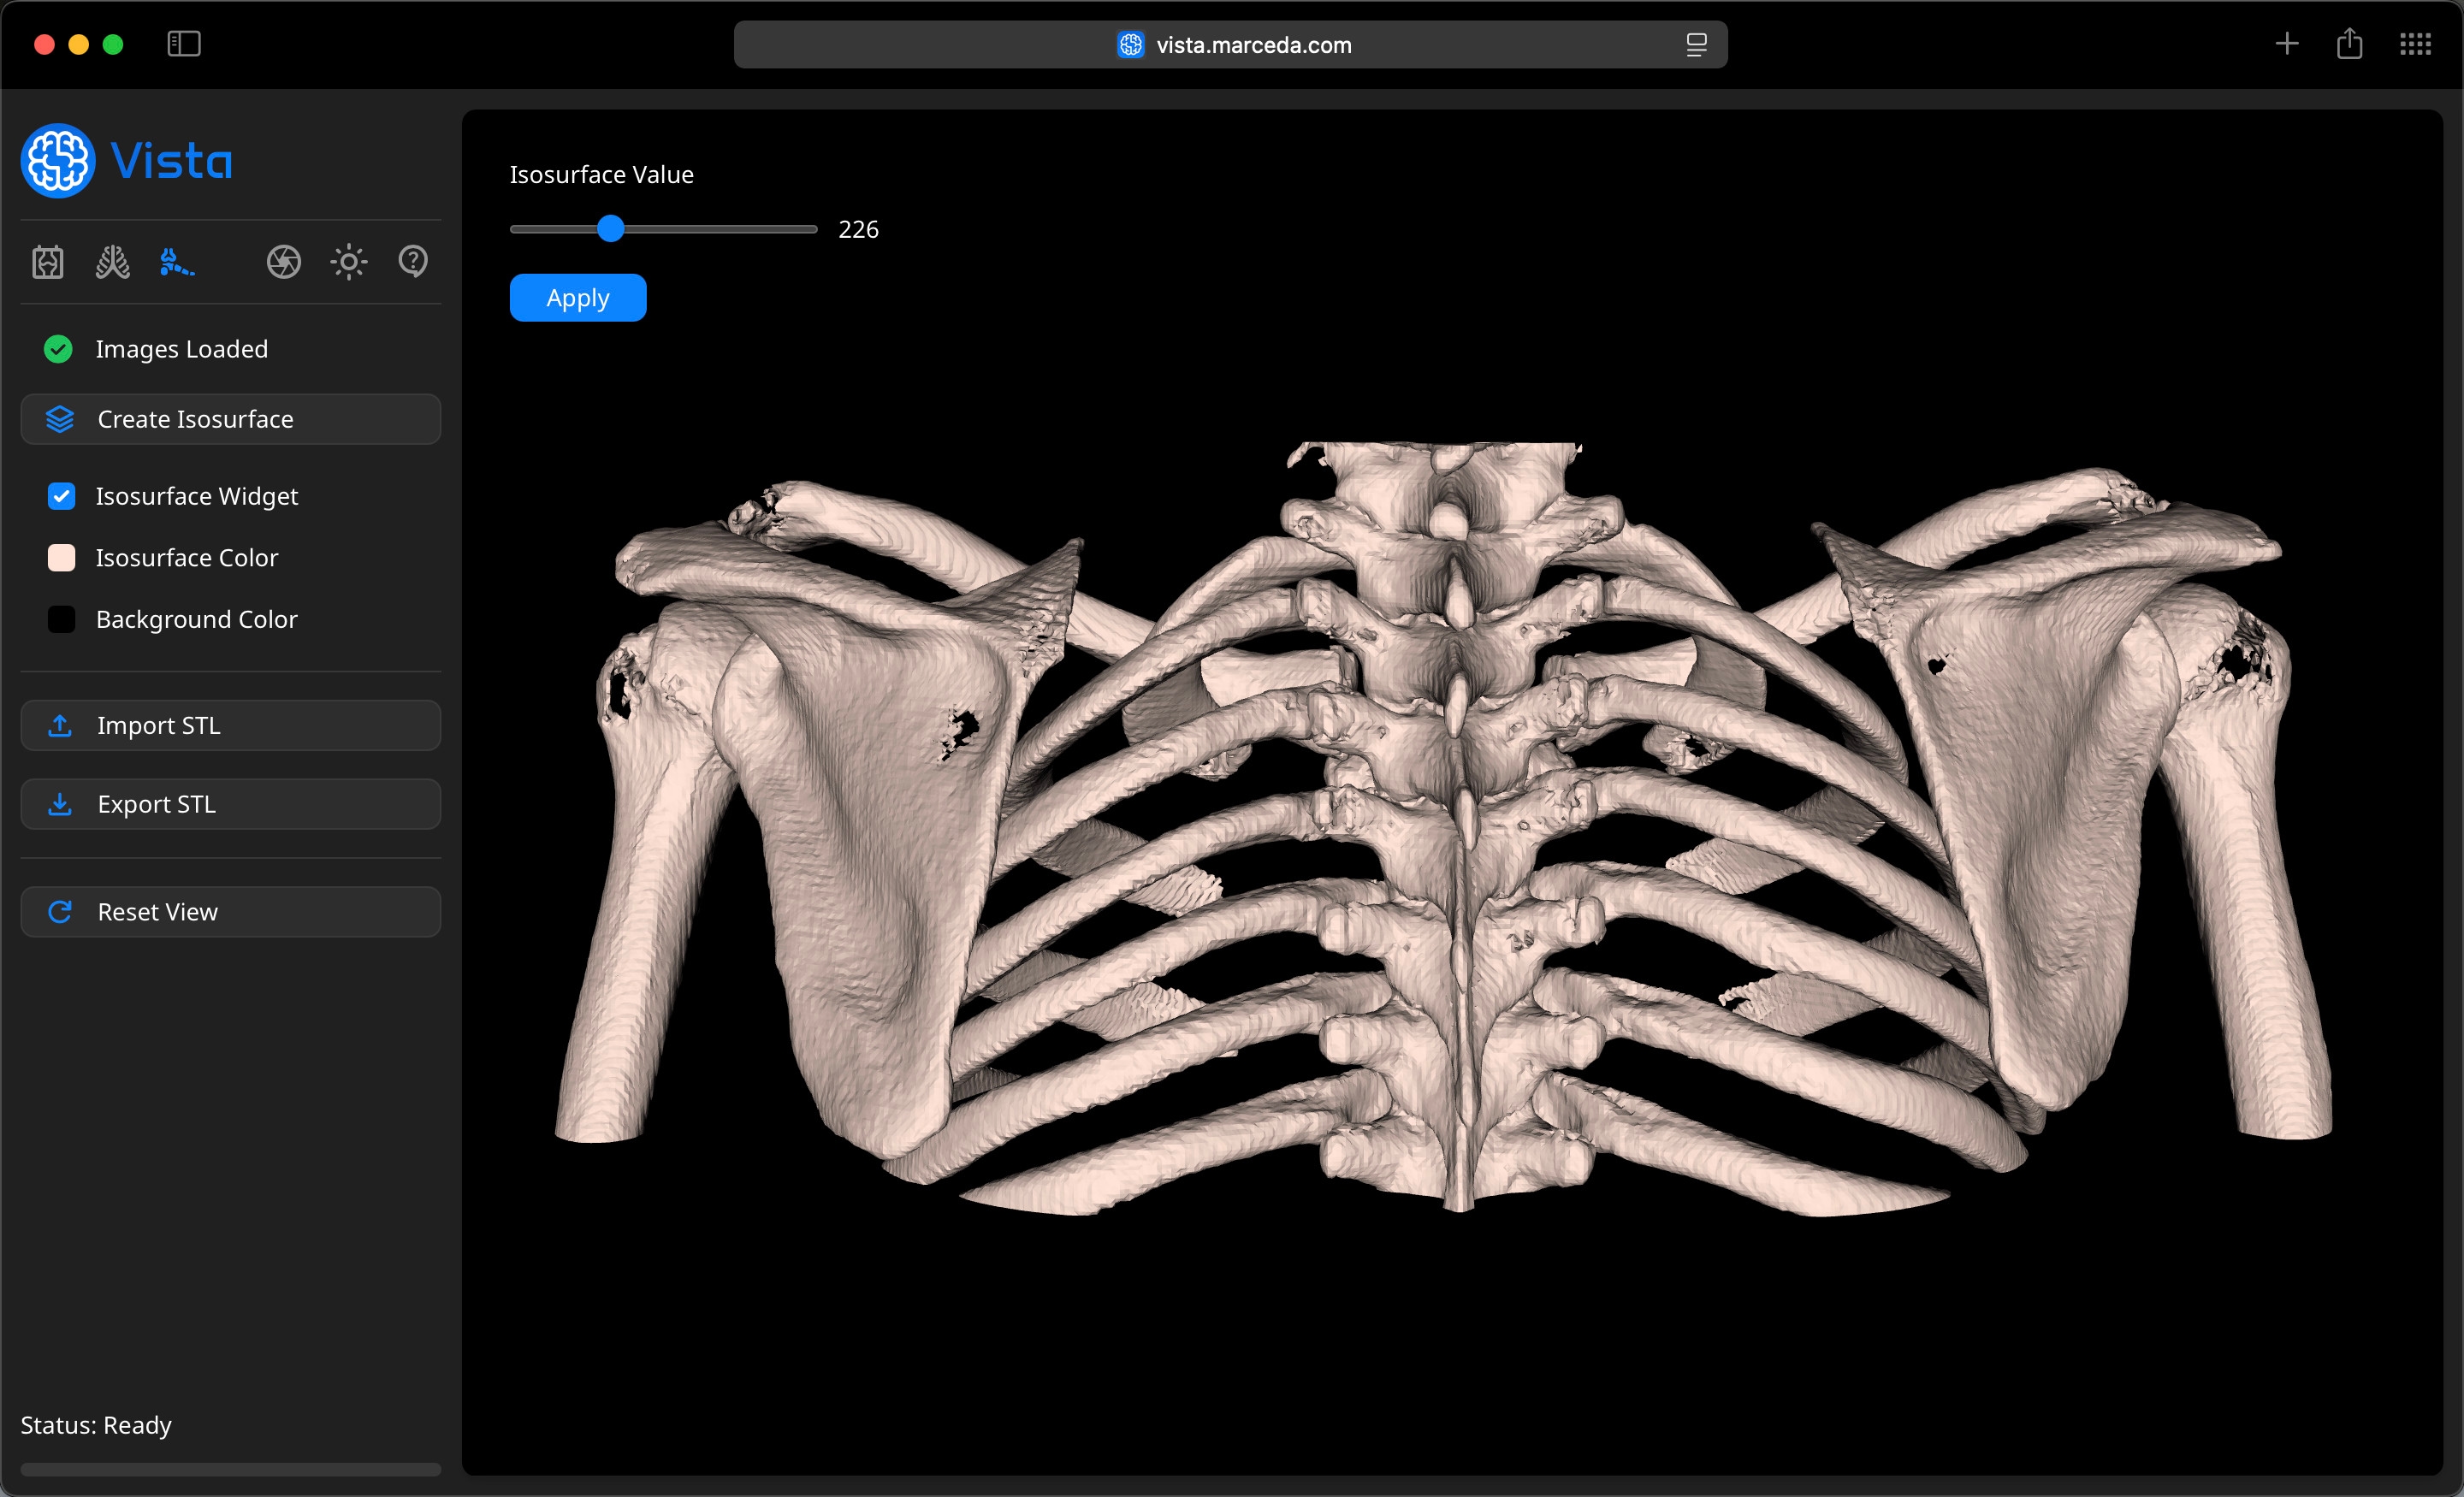
The initial surface will be created based on an Isosurface Value of 226 for CT scans, or 20% of the maximum data value for MRI scans. To the top-left of the Canvas, you will find the Isosurface Widget. It includes a slider where you can adjust the Isosurface Value. Drag the slider handle right to increase or left to decrease this value. Click 'Apply' to generate a new isosurface based on the updated value. Repeat this process to refine your model, until you hone in on your particular region of interest.
The range of applicable values is derived from the minimum and maximum values of your image data. For example, with CT scans, the minimum value would typically be -1024, and the maximum 3071.
This feature makes use of the Marching Cubes algorithm, a common method used to create Isosurfaces, from volumetric data such as image data from CT and MRI Scans.
The algorithm works as follows:
- The algorithm divides the 3D data into small cubes (voxels).
- Each corner of a cube is assigned a value based on the data (e.g. intensity in a CT scan).
- If some corners of the cube are above a threshold (the Isosurface Value) and others are below, the cube intersects the surface.
- The algorithm calculates where the surface passes through the cube and creates triangles to approximate it.
- By connecting these triangles across all cubes, a smooth 3D surface is formed.
Importing and Exporting Models
If you want to save your 3D Model to share with colleagues, or for further work such as 3D printing, click the 'Export STL' button. Your model will be saved to your Downloads folder, with the naming format 'Vista Export YYYY-MM-DD at HH.MM.SS.stl'. The model will be saved in STL Format, preserving the complexities and details of the 3D surface.
You can also import any 3D Model into Vista using the 'Import STL' button, as long as it is in the STL format. This allows you to view any 3D surface that you saved before, or any model created elsewhere.