Creating 3D Models
- Generating 3D Models
- Selecting Regions of Interest
- Import and Export of 3D Models
Learn more about cropping 3D Models here.
1. Generating 3D Models
The first step in the creation of 3D Models, is setting the minimum and maximum threshold values, required in the generation process. In the Activity Tab to the left, under the Create 3D Model section, under the Select Tissue Type Button, you will find Minimum and Maximum value inputs. Once a dicom series is imported, these two inputs will automatically update with the minimum and maximum values found in the dicom images. Adjust the values to match the types of tissue you want included in the 3D Model.
The table below can give you a guide to preset intensity values provided by the Select Tissue Type dropdown menu for CT Images, referred to as Hounsfield Units.

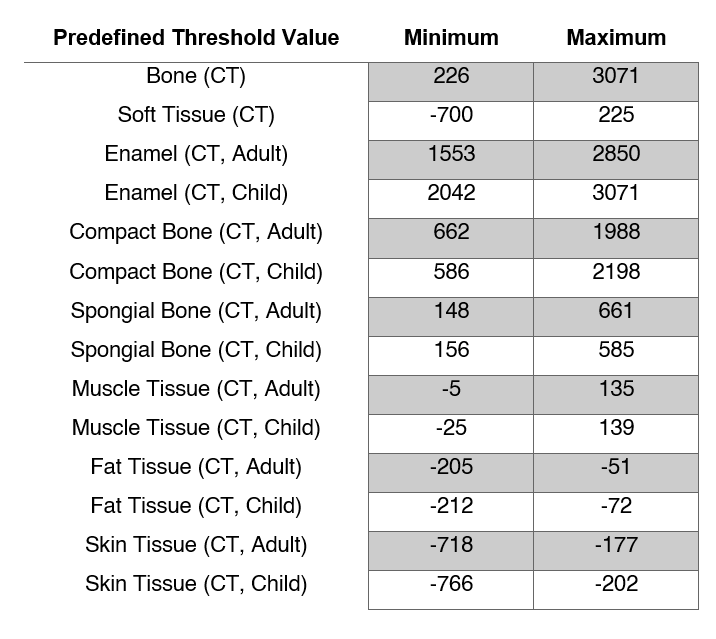
Hounsfield units (HU) are a dimensionless unit universally used in Computed Tomography (CT) scanning to express CT numbers in a standardized and convenient form. These units are named after Sir Godfrey N Hounsfield (1919-2004), a Nobel Prize winner who pioneered the CT scanner and made great contributions to radiology and medicine.
Generally, CT Images store values ranging from -1024 HU to 3071 HU; with -1024 HU representing air (in the lungs), 0 HU representing water and 3071 HU representing the most dense human tissue (Tooth Enamel).
Similarly, a presets for MRI Images are provided in the dropdown menu. However, these are experimental and will need adjustment.
Choose one of the options provided, and select Generate 3D Model to view the resulting Mesh in the scene. In the example below, CT-Bone was used to generate the cranium model. If you want to adjust the values further, simply type in your new values into the minimum and maximum inputs, and regenerate the 3D Model. Repeat this process until you are happy with your final model.
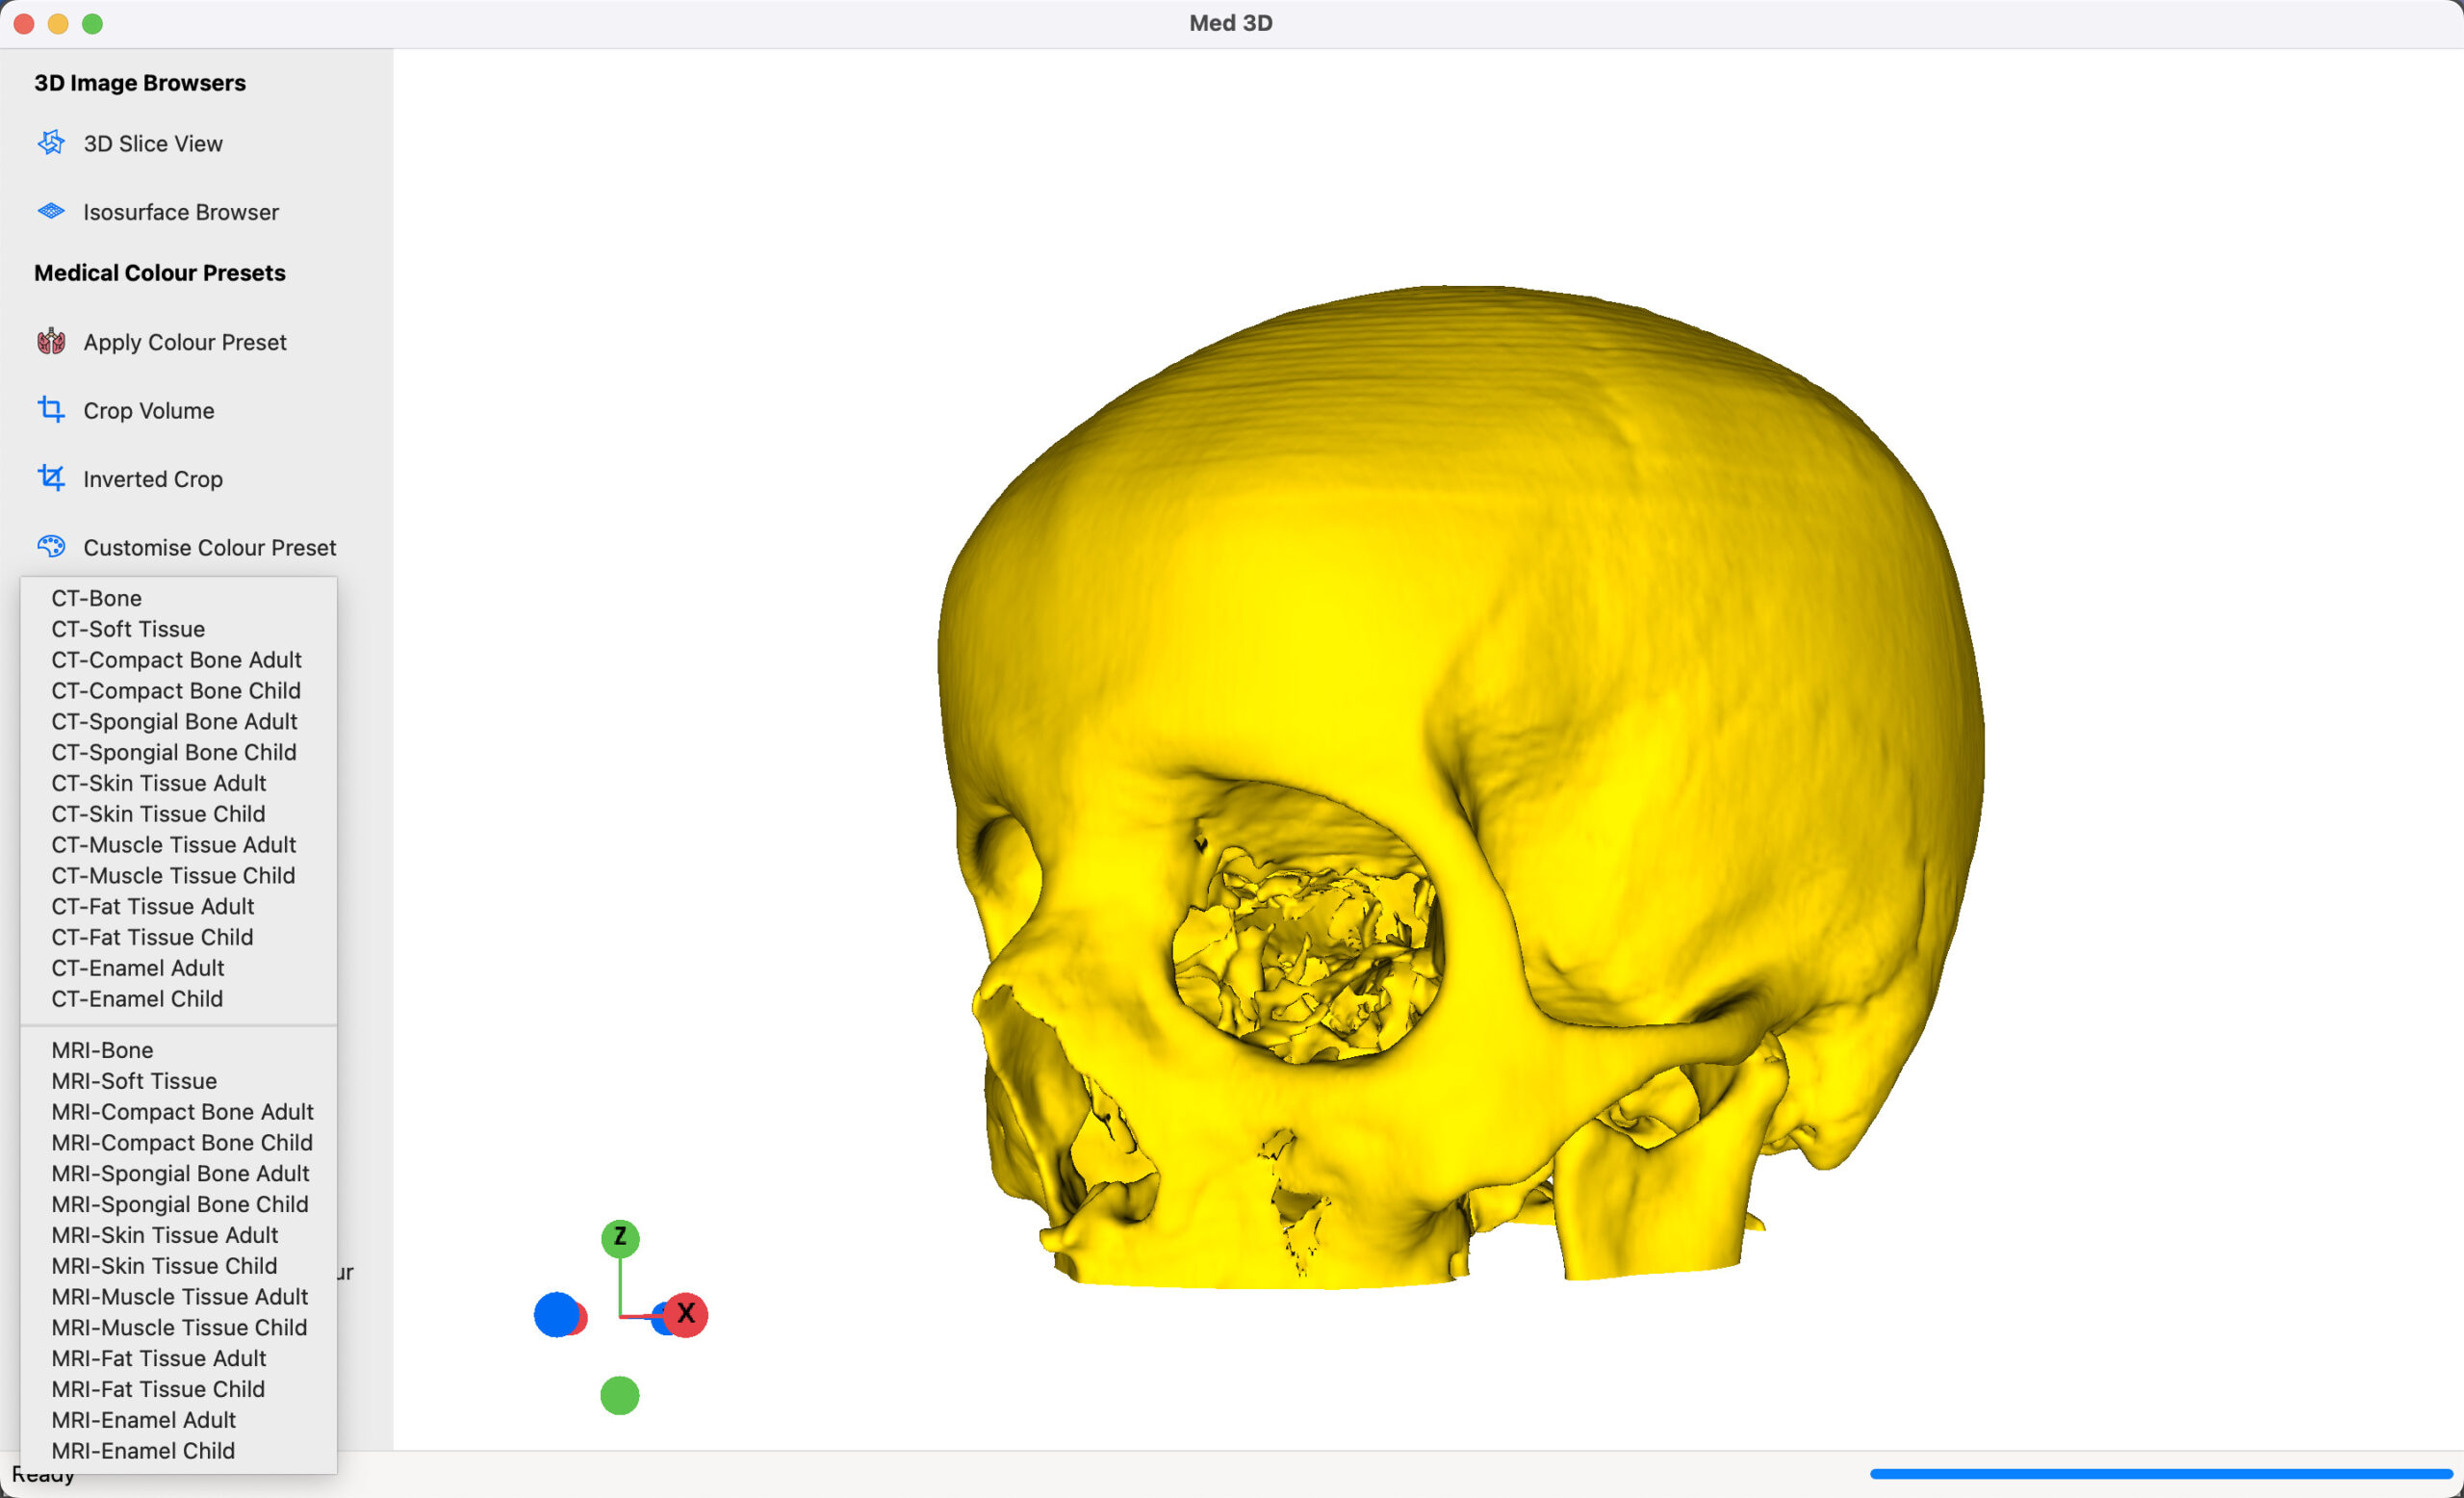
By default, every 3D model generated within the application passes through a ‘Fill Hole‘ operation. This function, ensures that the surface of a 3D model is watertight. As the name suggests, it ensures there are no holes/gaps on the surface, and is a requirement for models intended for 3D printing.
2. Selecting Regions of Interest
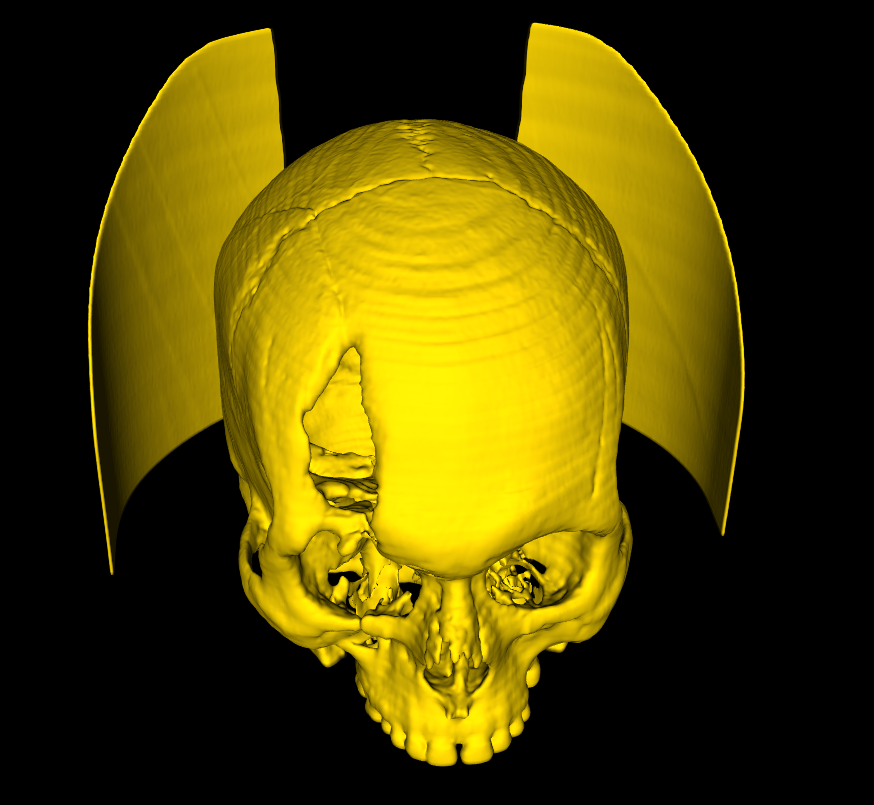
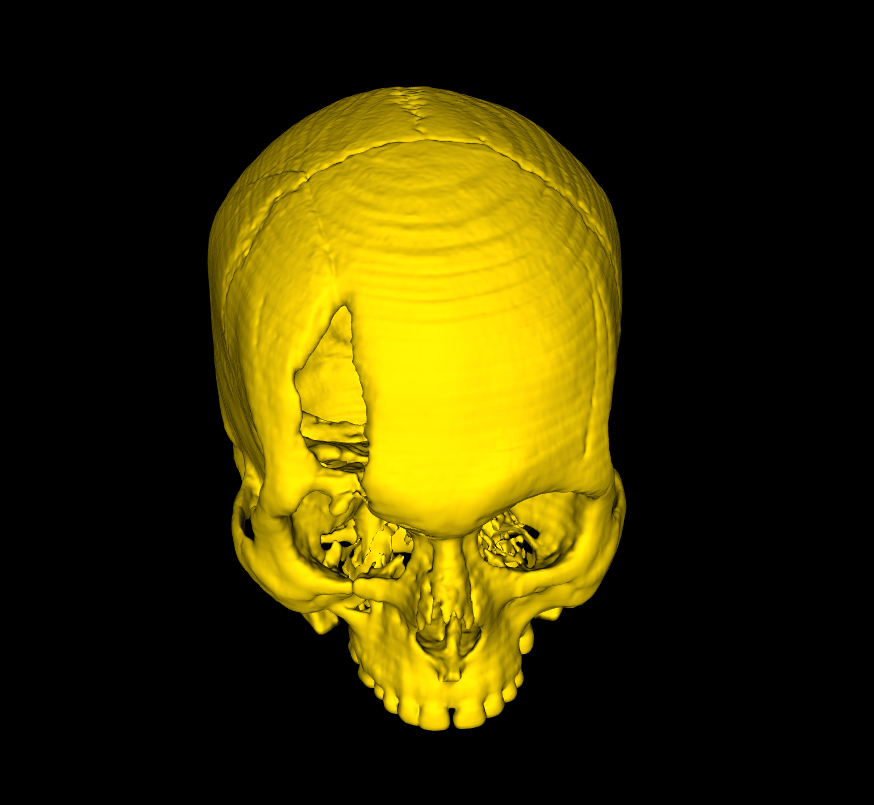
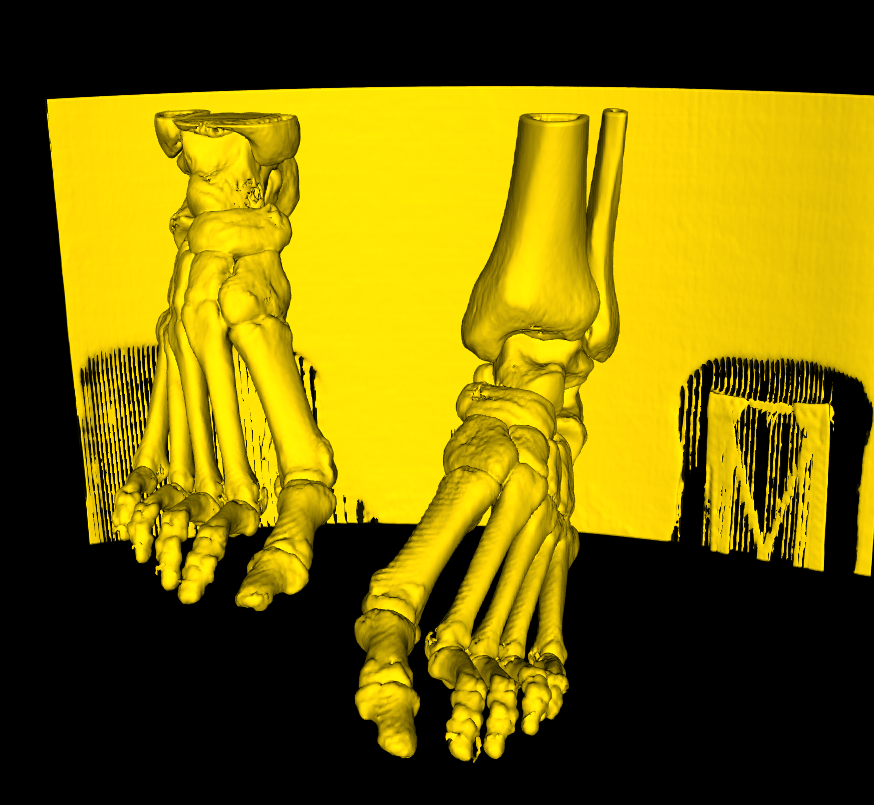
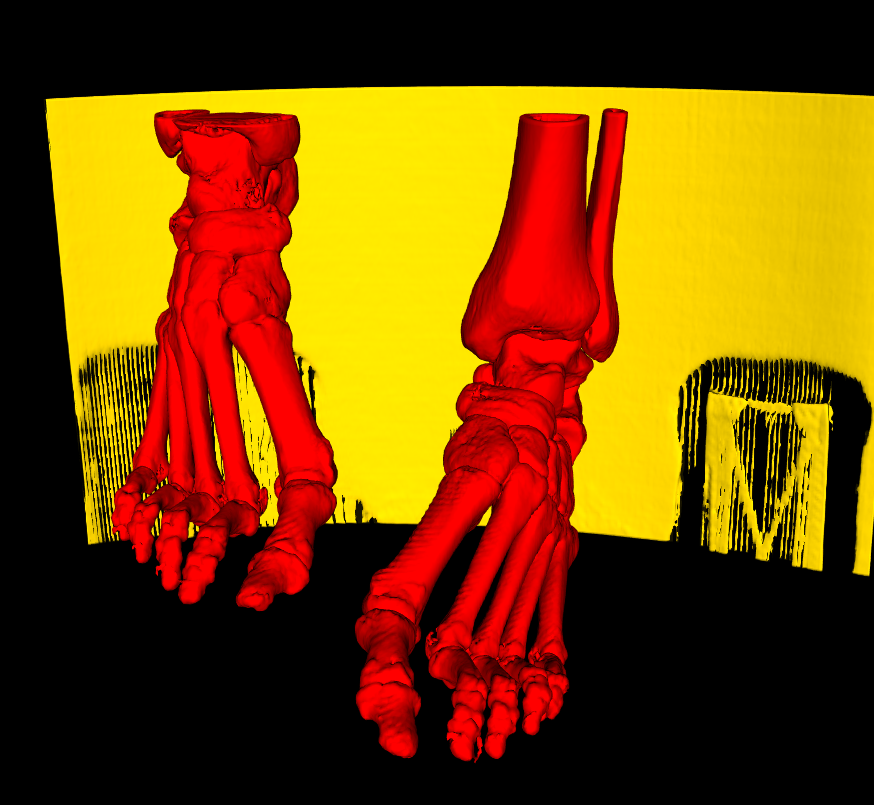
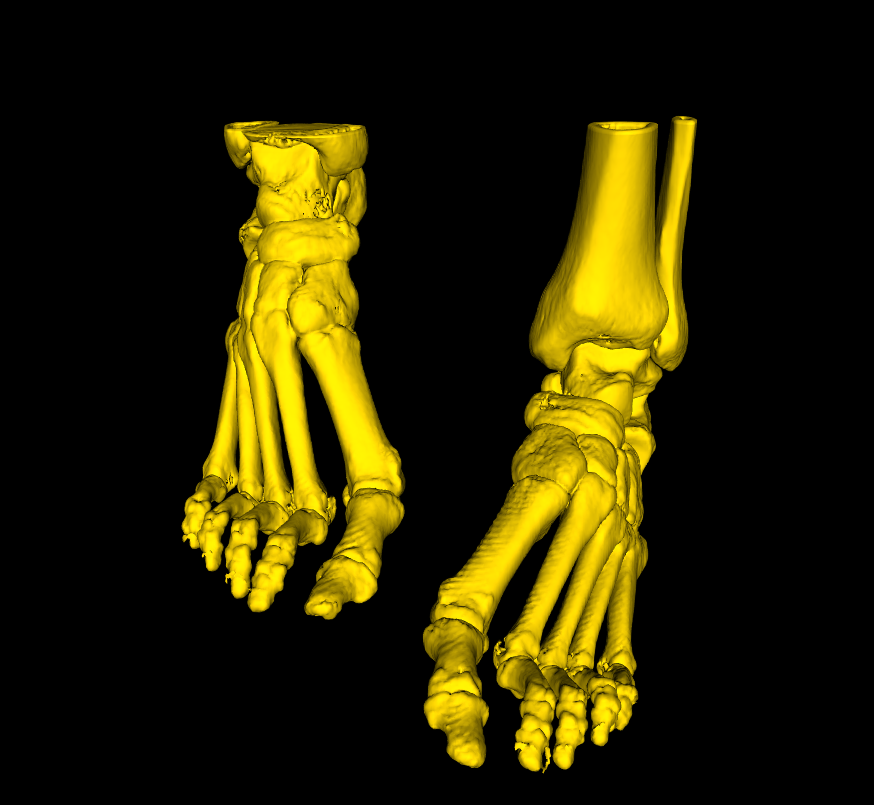
At times, you will encounter 3D Models that include a number of disconnected surfaces such as in the images below. Often, you will want to focus on one specific surface. Med 3D features two methods that allow you to accomplish this. The first, Extract Largest Surface, does exactly what the name describes. The operation will separate all disconnected surfaces, and keep the largest, getting rid of the rest. This is illustrated in the images below.
The second option, Select ROI, extracts each disconnected surface in the model, and allows you to pick and choose those that you would like to keep. The images below illustrate this function. Once the 3D Model is generated, left click on each part that you want to keep. This will be highlighted in red. To undo a selection, right click on a surface.
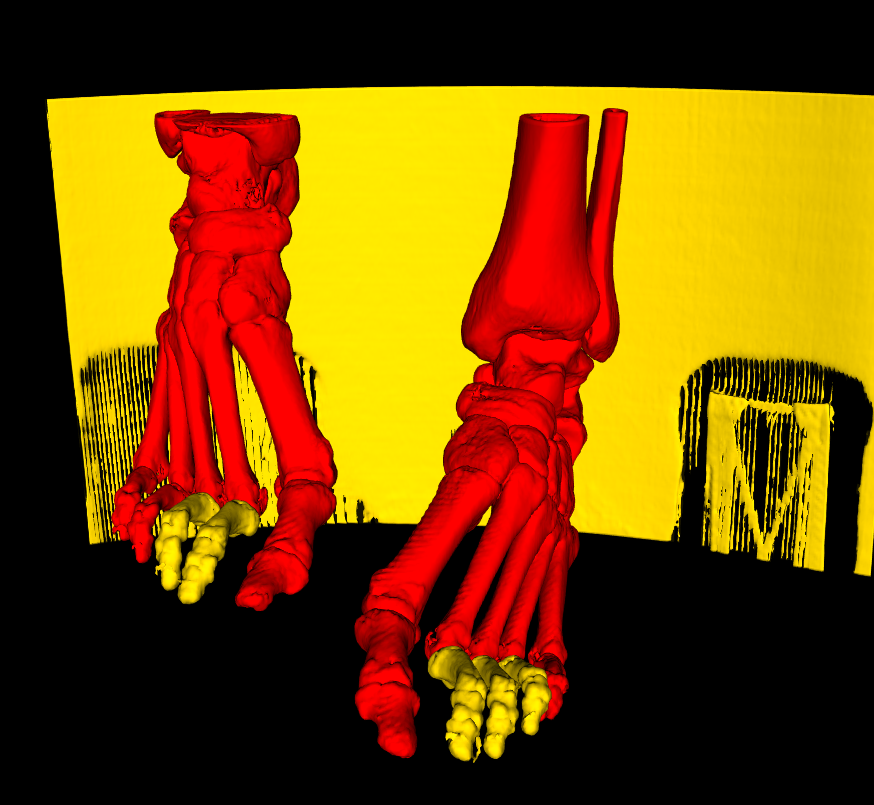
At the top left of the scene, you will find an Accept button and a Cancel button. If you are happy with your selection, select Accept, and all surfaces highlighted in red will be included in the final model. All others will be discarded. Select Cancel, if you want to undo any selection and return the model to its original form.
3. Import & Export
If you want to save your models for later analysis, or share with your colleagues, you can simply export your 3D models in the STL Format. In the menu bar, select File -> Export STL. A dialog will open, where you can name and choose the location that you want the model saved. You can import any saved STL file into the application, through the File -> Import STL option.
STL Files exported by Med 3D can be imported by any other application that accepts files in the STL Format.
STL is one of the most popular 3D model formats used in the world today. It is also the simplest. STL’s most relevant properties in this context are:
- It does not store any information on a model’s colour or texture. The format simply stores information on the shape of the model.
- Consequently, it has the smallest file size and is the most convenient for sharing models with others.
- It is the format most used in preparing 3D models for 3D printing. Therefore, if you are exporting models to be printed, this format would be ideal for you.